


So you want to build a DIY Grill Station but are not sure how to go about doing it? Then you have come to the right place. I spent hours looking for the right plans for me, before I finally decided to create my own. Check out how we built our grilling station and do what works best for you. We did this project 3 years ago and it’s held up wonderfully!

Why you’ll love this project
- Beautiful: The finished homemade grill station we built has a beautiful stone tile on the front and a gorgeously shiny black top.
- Custom Built: One of the best parts about this grilling station project is that it is customizable for your grill and the look you want to achieve.
- Fire Resistant: All of the materials I used for this outdoor grill station are fire resistant for up to 1 hour of direct fire.
- Removable Grill: Just in case your grill stops working or you decide to buy a new one, the grill in this plan is completely removable from the cooking station.
Looking for more Outdoor DIY Projects? How about some of my favorites: How to Build a Porch Planter Box, DIY Flower Box Welcome Sign
Why I decided DIY was the way to go
I was so excited to partner with the Home Depot to tackle this project we’ve been wanting to do for so long! I started researching how to build a grill station an all kinds of things came up. One issue that I ran into was most plans I came across were for a gas grill and we wanted to do a grill station with a charcoal grill. I also really wondered what type of material people build the frame with. There’s an option of getting a pre fabricated metal frame made. That’s going to be more expensive but is a great option. I thought there’s no way people use wood, right? But as I started to do more research I saw that people (DIYers and some pros I came across) do use wood to do the frame as well, it just has to be covered with a fire resistant material. We decided to use Hardiebacker cement boards. According to the manufacturer, it will not ignite when exposed to direct flame or contribute fuel to a fire, heat will transfer through them. Because of this, the product itself is not 1-hour fire rated. However, they do qualify for use in certain 1-hour fire rated Warnock Hersey and UL assemblies. Think of it as a pan used for cooking. The pan can be directly exposed to a stove’s flame and not burn, yet the food in the pan will cook in time. Having an interior wallboard that resists burning for 1-hour buys time for the homeowner and fire professionals.
Materials List
Purchasing as many of the items as you can through Amazon and having them delivered to your door will help make this project quicker and easier. I recommend these products because they are the ones I used in my project and I love the way my project turned out. If you click the link and make a purchase from Amazon, I will receive a small commission with no additional cost to you. ~Thank You!
Tools List
In this section, I recommend the tools that I used and found made this project doable. Know that several of these tools are tools you will only use when doing a tile project, so they could potentially be a one-time use tool and therefore you may want to think about renting the tool or borrowing it. However, something like the 20 V Max Drill is a tool every DIY’er should have in their tool box and you will get a ton of use out of it.
See the full list of all the tools I believe are MUST Haves for any DIY’er!:
How to Build a DIY Grill Station
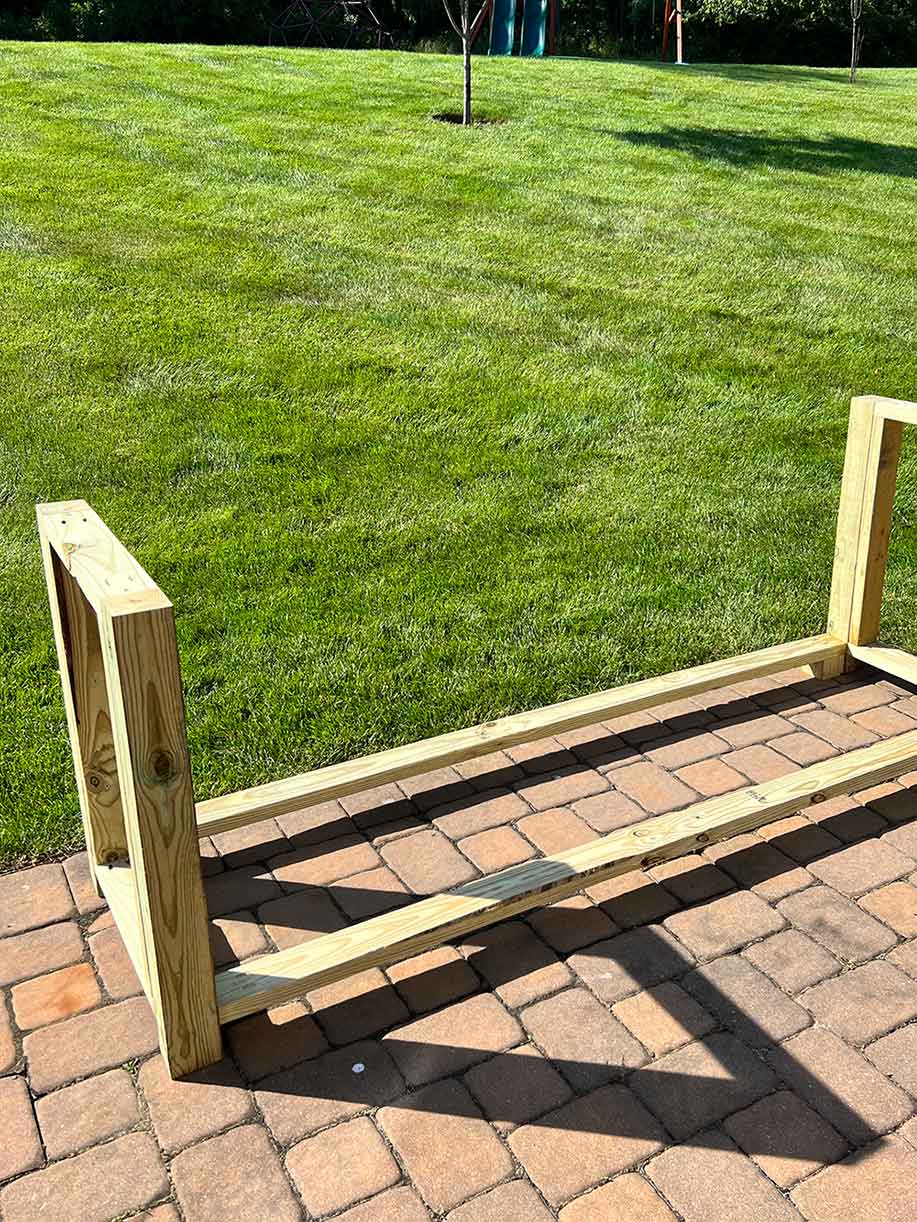
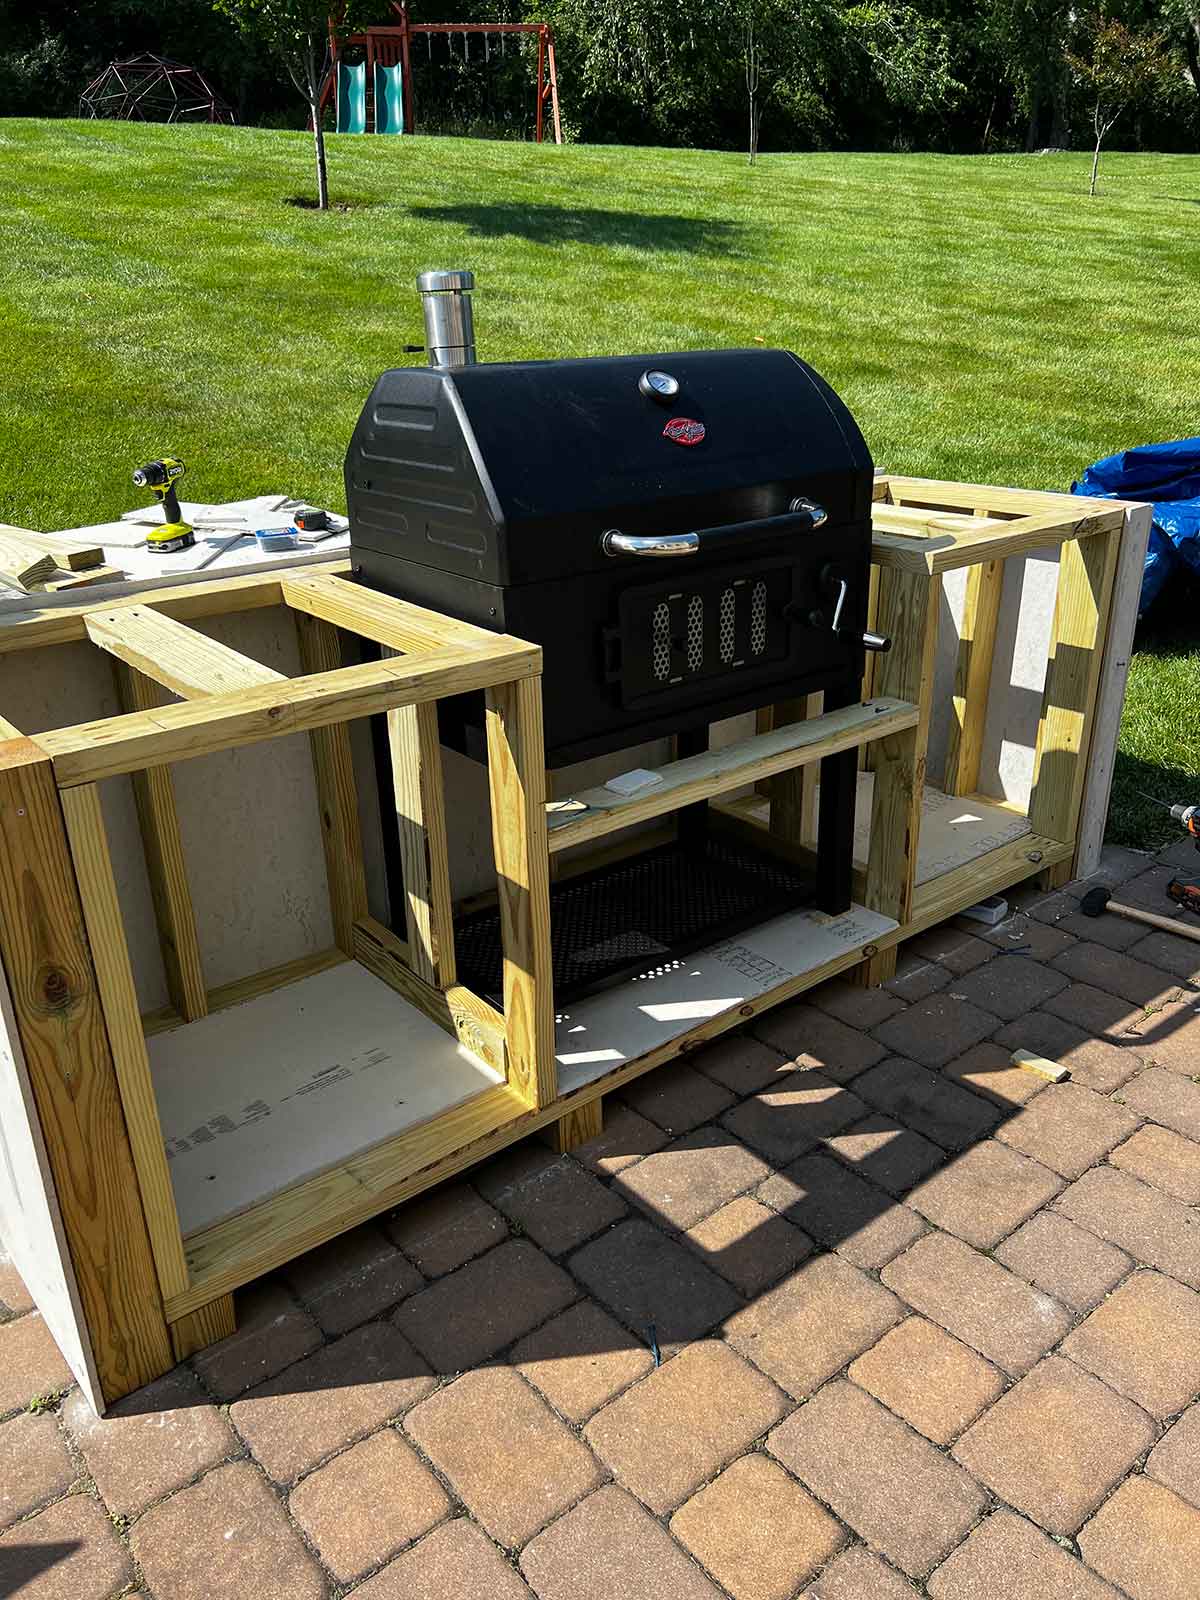
- Build the frame using 4×4’s (side frames) and 2×4’s (Image Below).
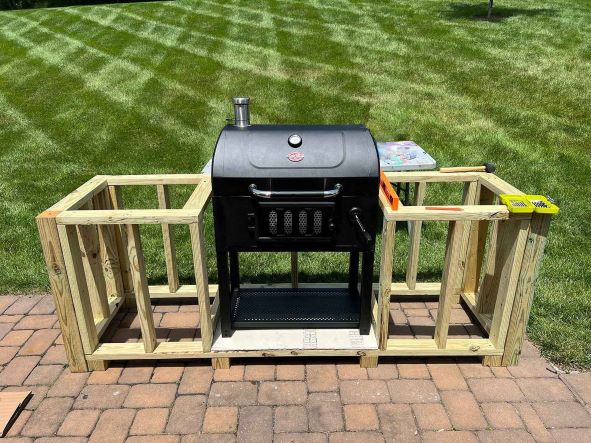
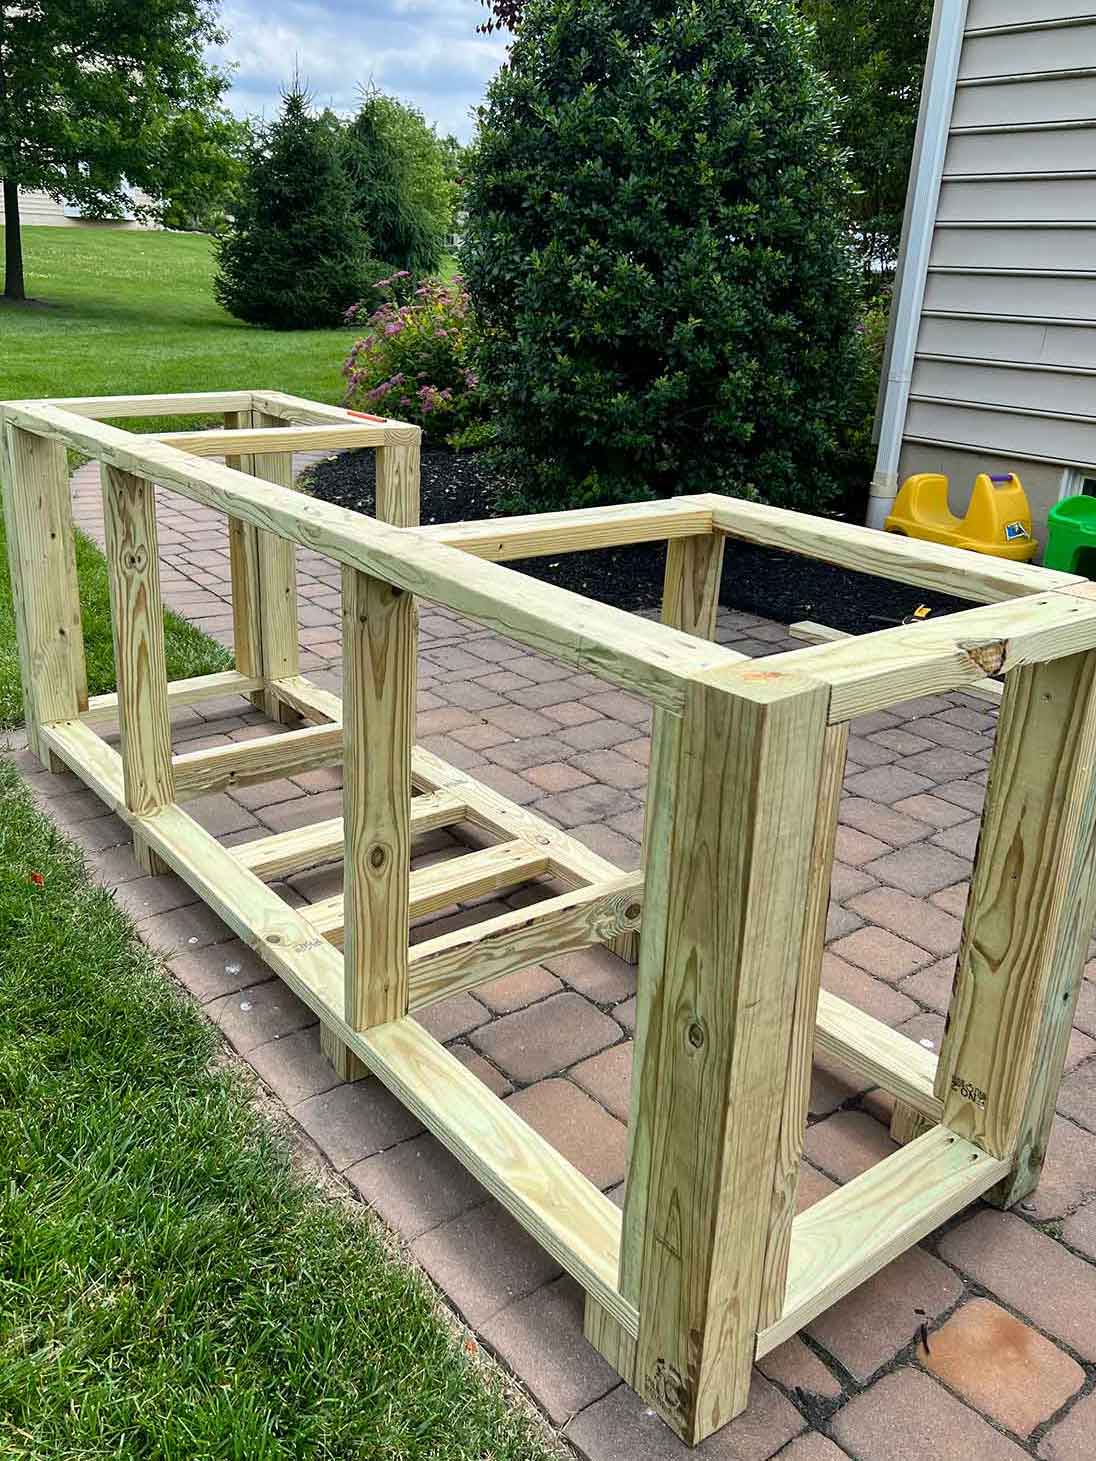
Step 2: We wanted our Char Grill to fit in the center so we framed it out with a middle opening. We added additional 2x4s based on the size we wanted each wing to be (2 Images Below). Your measurements will be determined on the grill you are using.
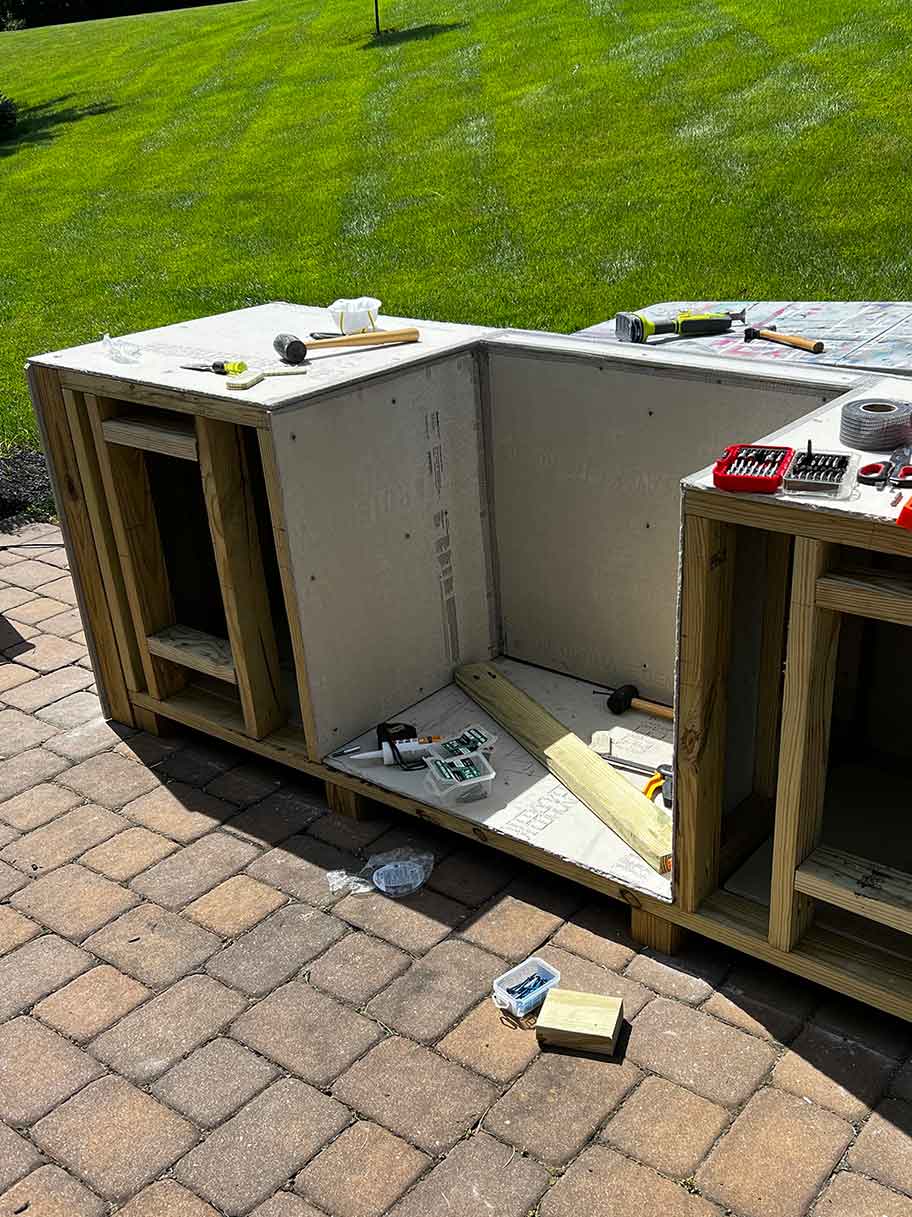
Step 3: We cut the cement board to size and attached to the wood frame using cement screws. Originally, we planned to do double doors in the middle under the grill so we covered each side with cement board, but we decided to do 2 – single doors instead. So we had to take the boards off (Image Below).
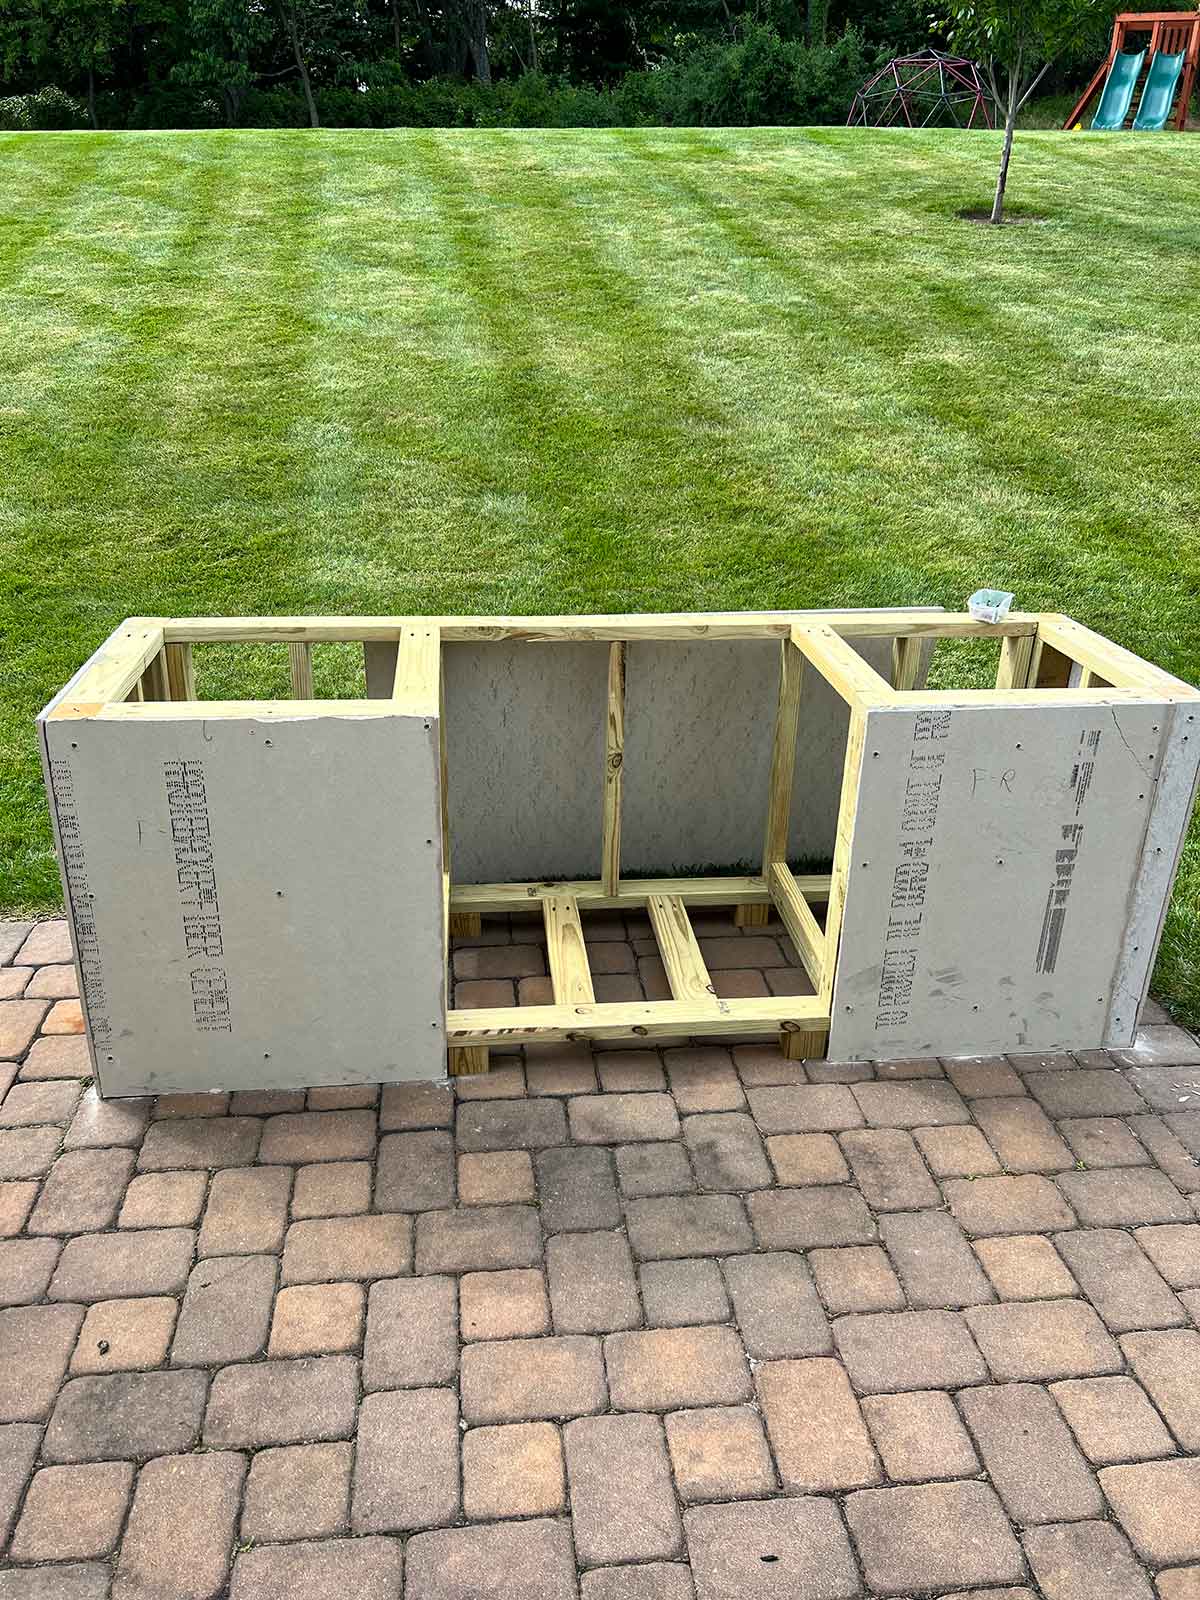
Step 4: This is how it looked when the boards were removed (Image Below).
Step 5: Frame Out Opening For Grill Doors
Since we decided to do 2 single doors, we had to frame out the opening for the grill doors. The cut out size will be listed on whatever doors you choose. Ours are 14×20” (cut out size 11 5/8″ w x 17 5/8″ h). We used 2x4s to create the frame on each side then added cement board over those areas (Image Below).
Step 6: Once the framing and cement boards were in place , we added the doors.
Step 7: Add Fire Barrier Plus Latex Sealant To The Exposed Seams
We added this sealant to all the open seams on the interior where the grill would be installed (Image Below).
Step 8: Add Galvanized Stainless Steel Sheets To The Middle Grill Area
We wanted to cover the inside middle area with stone, but it didn’t allow enough room in grill area for that to work. We decided to use galvanized stainless steel sheets that we cut with tin snips. The sheets are very sharp so make sure you wear your gloves! We secured them with self piercing roofing screws.
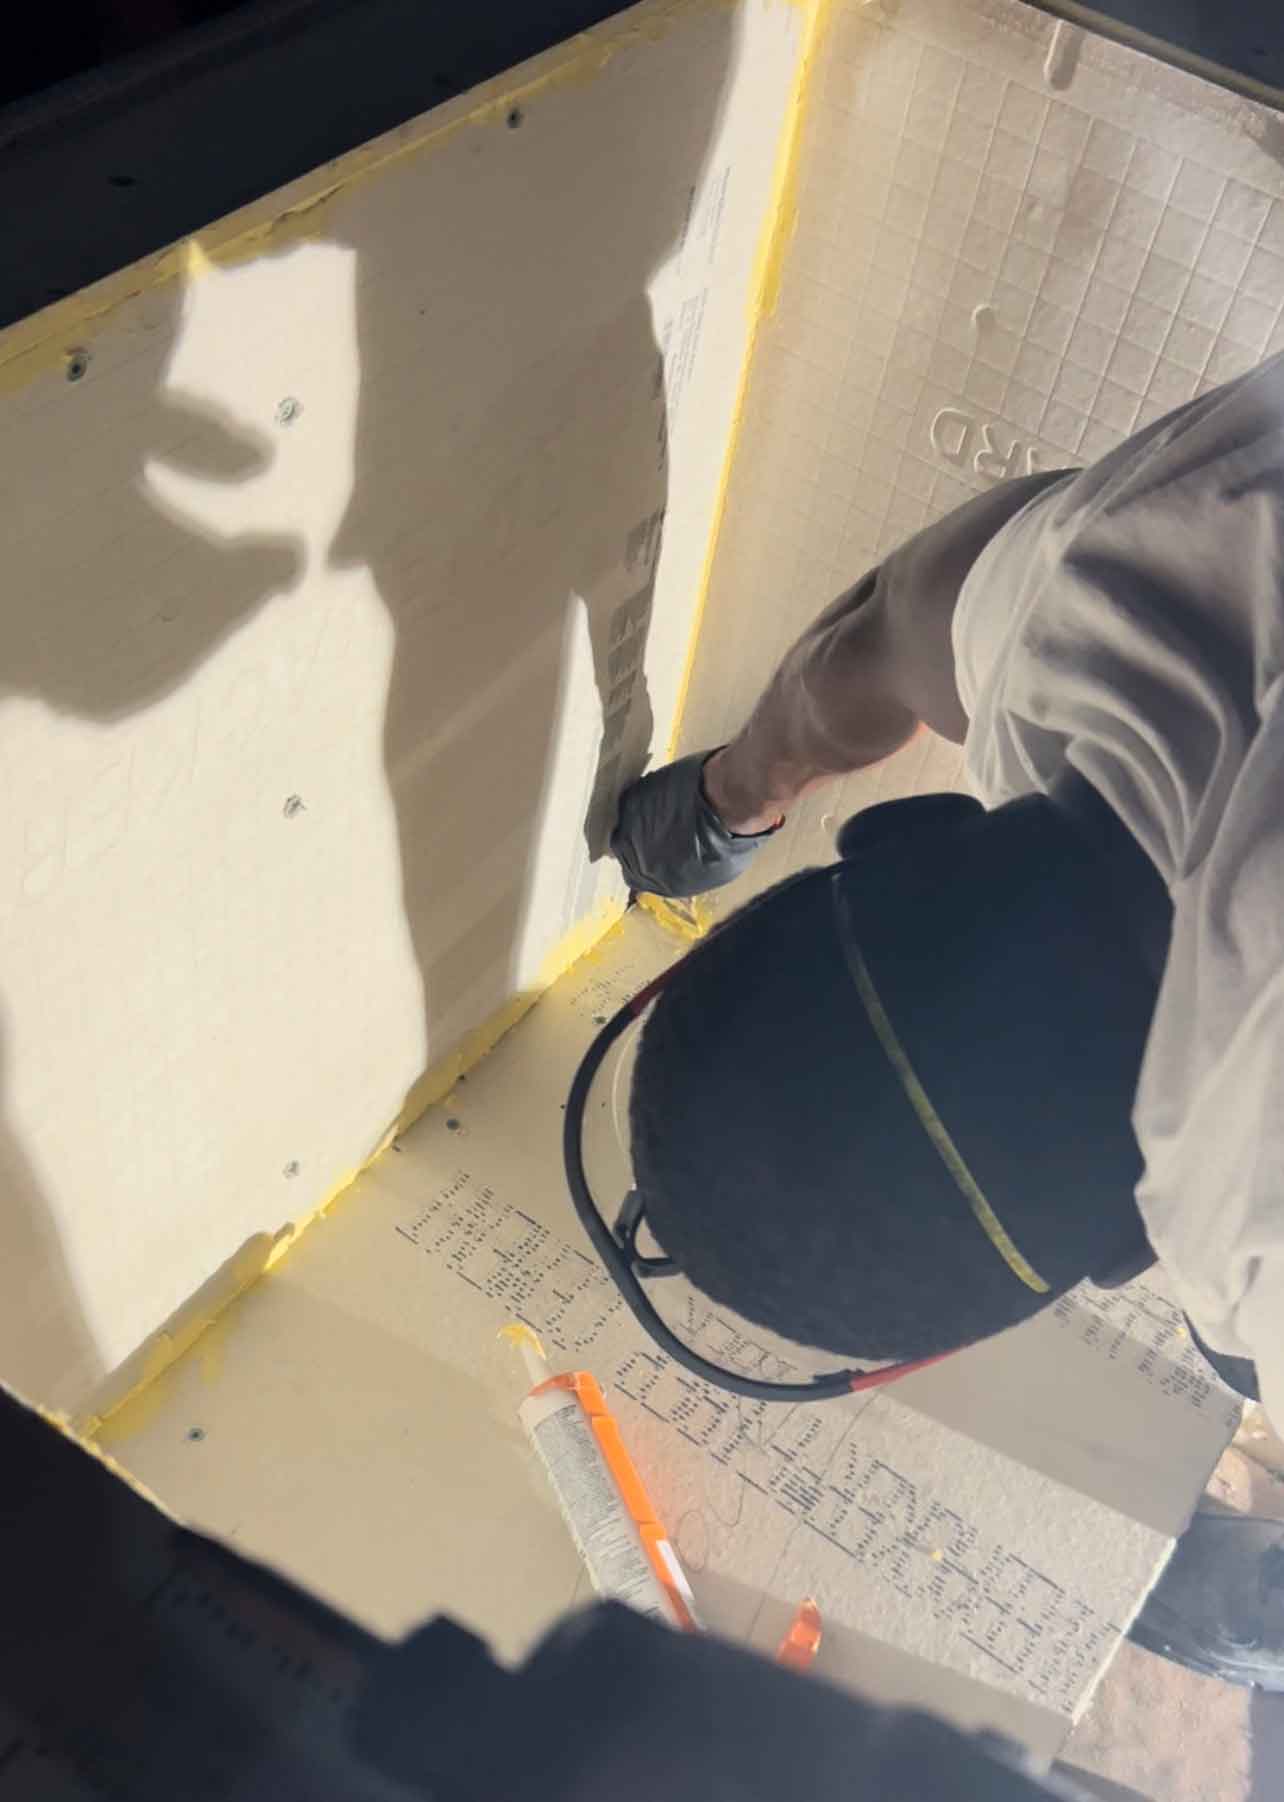
Step 9: Add Cement Board Tape Over Joints And Corners
We used cement board tape to cover all the seams, then added thin-set mortar over it. Next is to let it dry (Image Below).
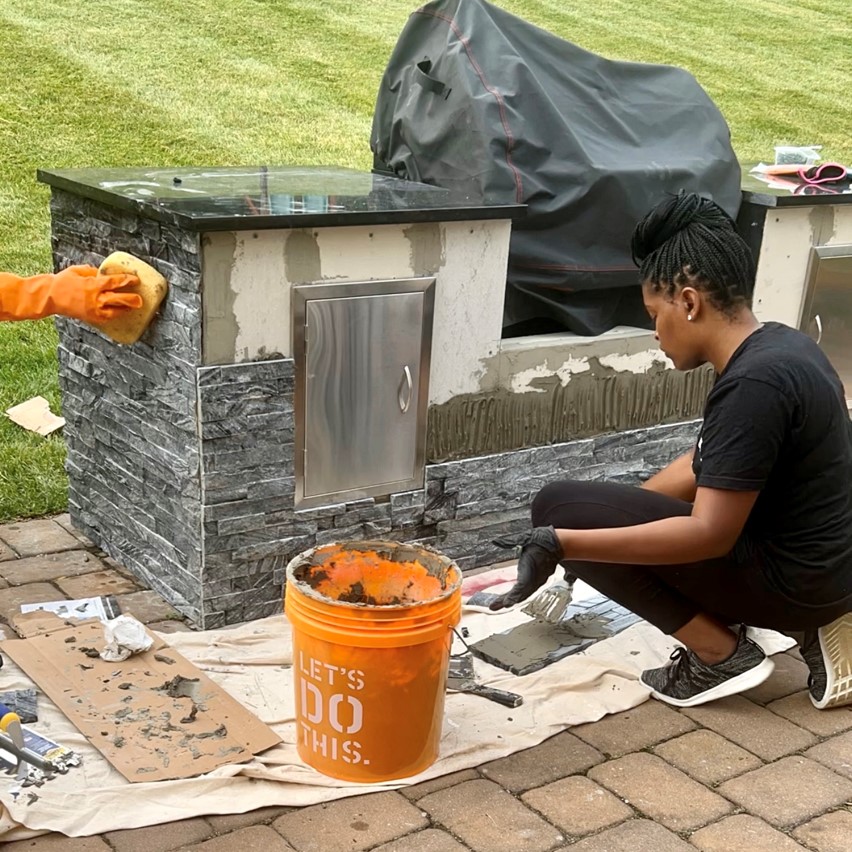
Step 10: Set Out Your Stones And Set Up Wet Saw
We took ledger stones out box and laid them out to get an idea of how they will look. Then, we set up our wet saw to make cuts. We cut straight edges on all the corner pieces to start (Image Below).

Step 11: Mix Thin-Set Mortar And Tile
We used Pro Lite 30 lb Gray Tile and Stone Mortar and a steel trowel (1/2”x1/2”x1/2”) and joint knife to apply the stone to the cement boards all around. We started from the bottom and made sure everything was level then worked our way up (Image Below).
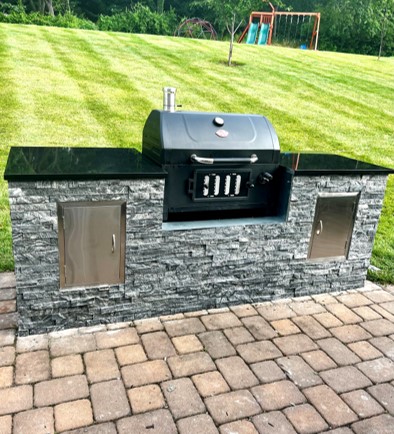
Step 12: Seal Stone (Optional) And Step Back And Admire Your Work
We love the way it turned out! Can’t wait to use it all summer! (Image Below)
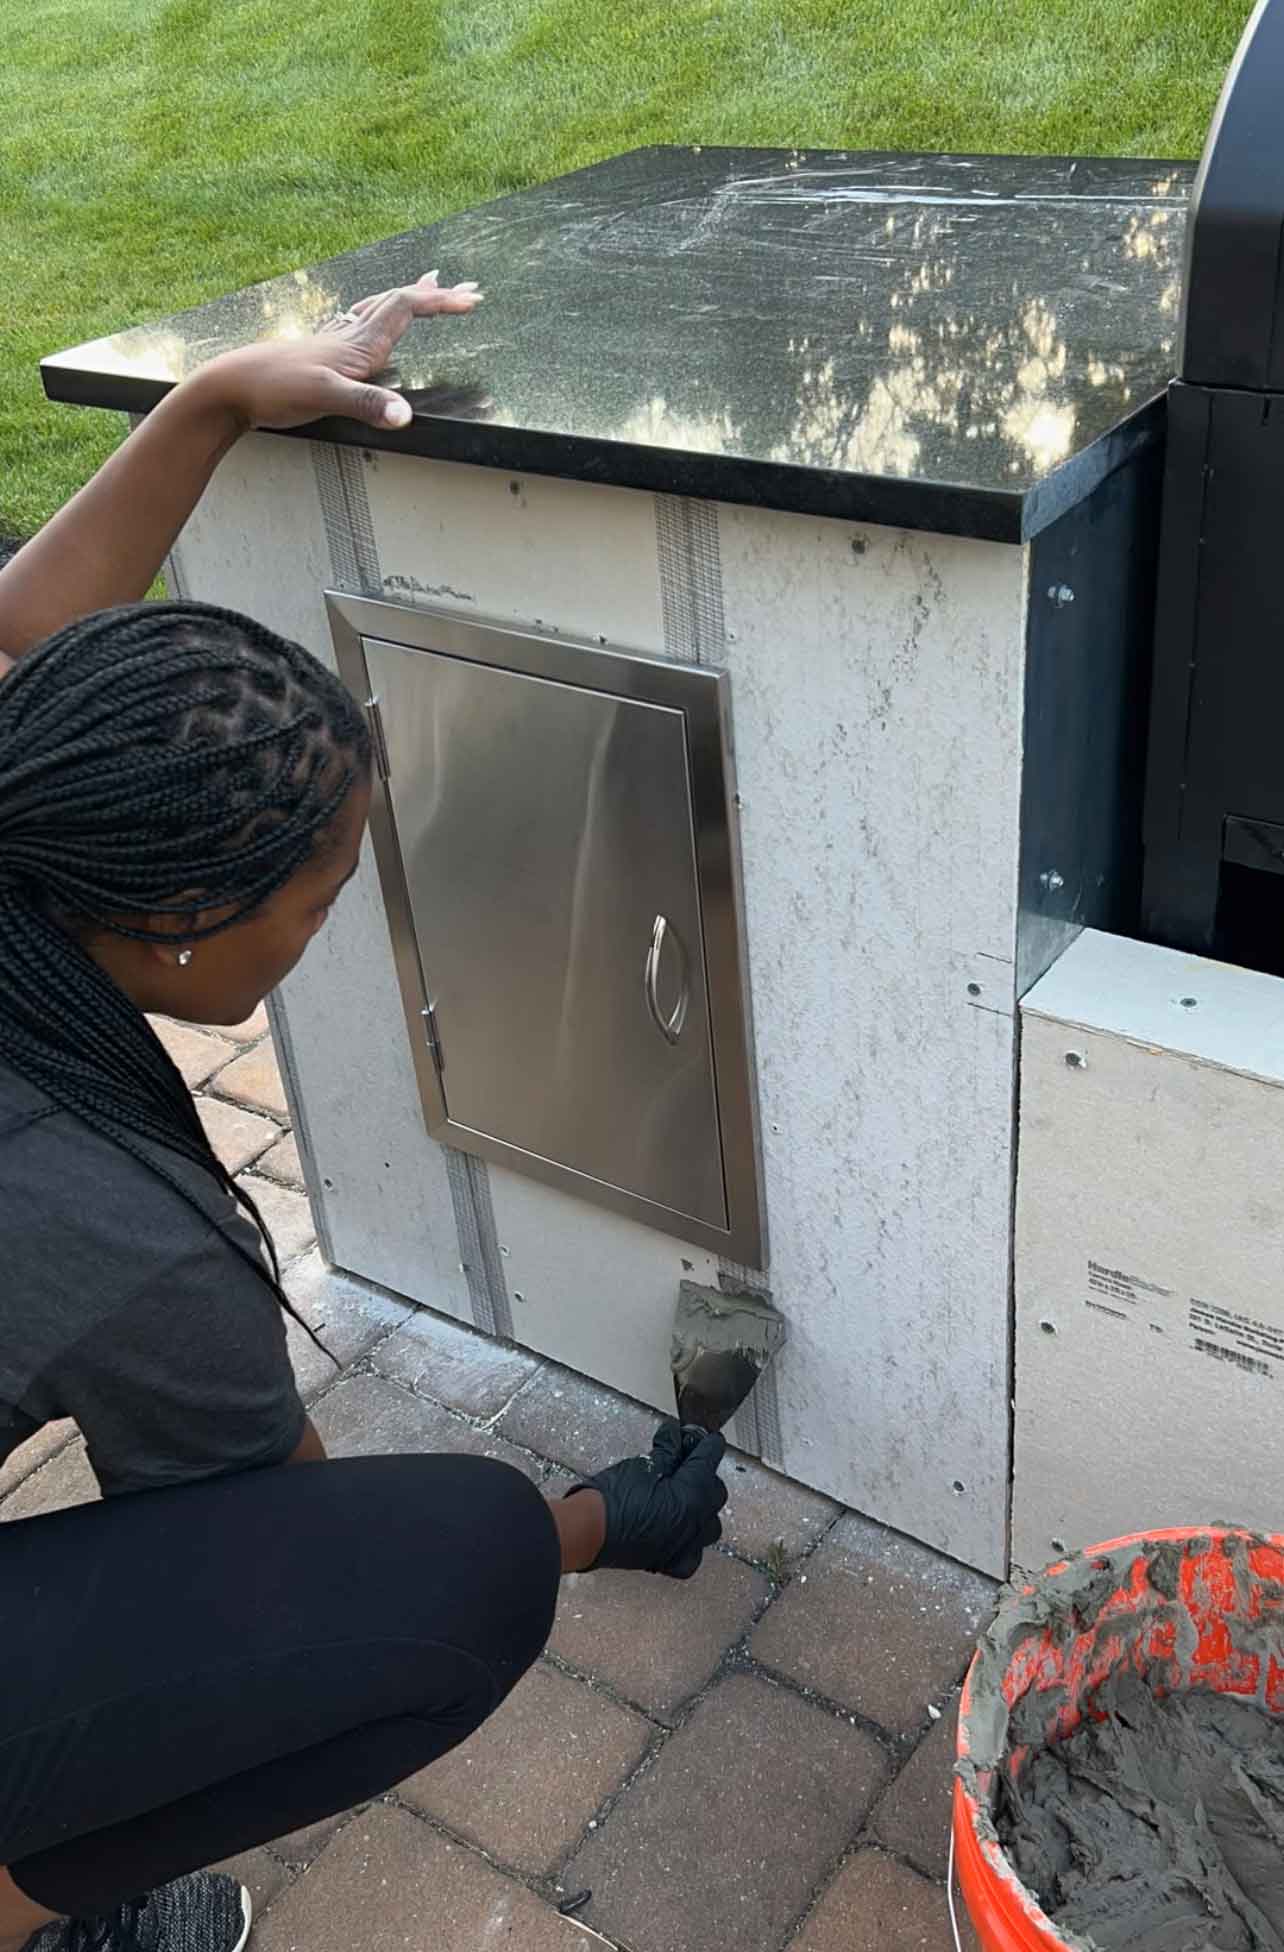
UPDATE:
We ended up adding a granite ledger to the grill station to really give it a finished look. See below:
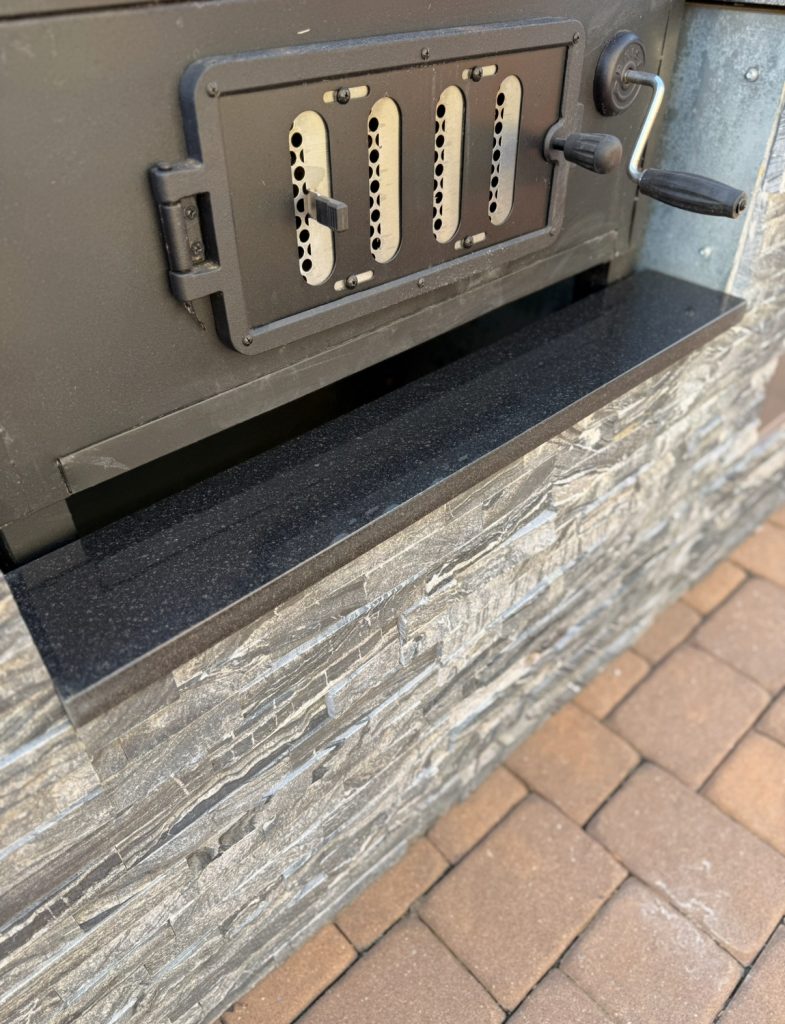
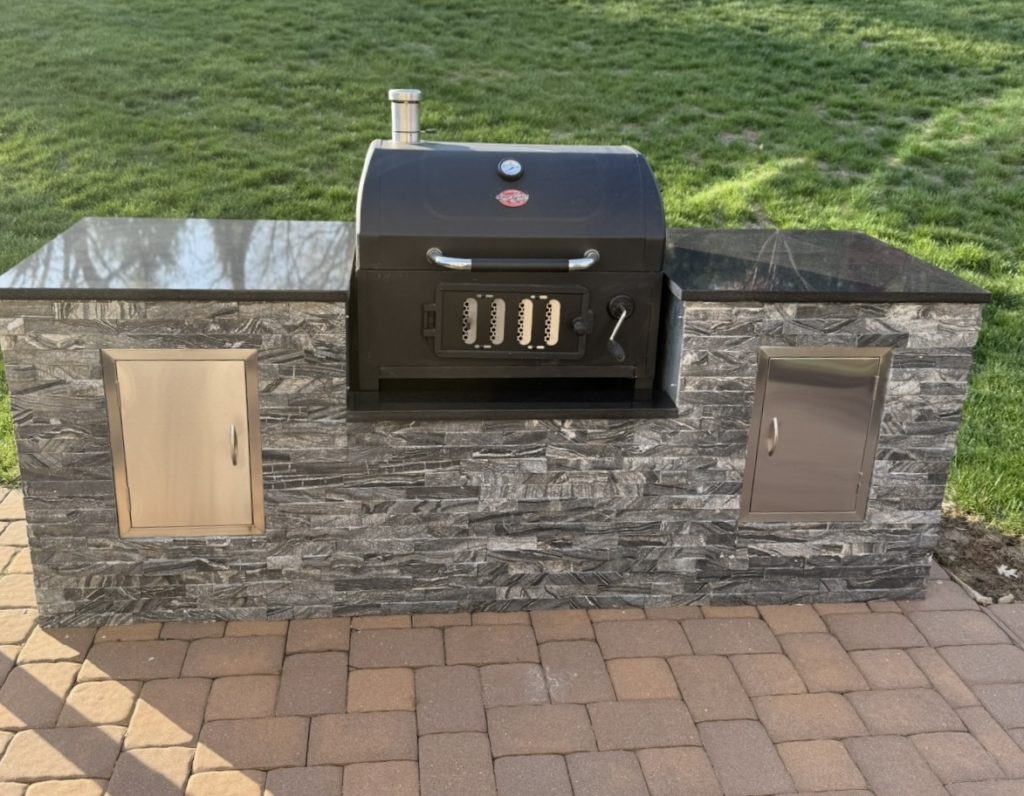
*This is how it currently looks as of April 2025.
Ways to make this project even easier
The best way to make any DIY project easier is to have the home improvement store make all your cuts before you leave!
FAQ
Would these plans work for a gas grill?
Yes, you would just have to build around your grill the same way I built around mine. The only thing you would need to change is adding access to where ever your propane tank is stored.
How far should a grill be from the house?
the rule is to put your grill at least 10 feet from anything that can burn such as wood.
Is it okay to grill on a covered porch?
As long as there is at least 3 feet above the grill, you can grill on a covered porch.
Is it safe to put a gas grill on a wood deck?
It is safe to put a gas grill on a wood deck.
Shop this Project

9 Amp Corded 7 In. Wet Tile Saw With Stand

Classic Charcoal Grill In Black

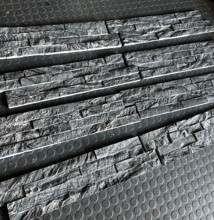
Glacial Black Ledger Panel 6 In. X 24 In. Natural Marble Wall Tile (10 Cases / 60 Sq. Ft. / Pallet)

ProLite 30 Lb. Gray Tile And Stone Mortar

#12 X 3/4 In. Hex Head Zinc Plated Sheet Metal Screw (50-Pack)

30 In. X 24 In. 26-Gauge Zinc-Plated Sheet Metal

36 In. X 48 In. Galvanized-Steel Flat Sheet

10.1 Fl. Oz. Yellow Fire Barrier Plus Latex Sealant

FibaTape Alkali-Resistant 2 In. X 150 Ft. Self-Adhesive Cement Board Tape

HardieBacker 3 Ft. X 5 Ft. X 1/4 In. Cement Backerboard

HardieBacker 3 Ft. X 5 Ft. X 0.42 In. Cement Backerboard

#9 X 1-1/4 In. Serrated Flat Head Star Drive Cement Board Screws (750-Pack)

#8 X 2-1/2 In. Square Blue Ceramic Plated Steel Washer Head Pocket Hole Screws (50-Pack)

4 In. X 4 In. X 8 Ft. #2 Ground Contact Pressure-Treated Southern Yellow Pine Timber


Good morning! Wow your video is very great! Your grill is really beautiful! I would like to do this kind of project for my bbq. I don’t think I saw where you bought your metal doors. can you tell me?
This is amazing! Great job researching and doing it yourself. What about the counter part on top? I don’t see a step for that