


This DIY Flower Box Welcome Sign is the perfect beginner friendly project to help you save money on your next event while not sacrificing style when welcoming your guests.

Why you’ll love this project
- More Cost Effective than Buying: Online, an already made flower box welcome sign can go for between $140-$300! This DIY project is much more cost effective at around $65!
- Easy Beginner Project: As a beginner, you will easily be able to make this project in about 1 hour with basic skills and tools every DIY’er should have.
- Customizable: Change up the look of this diy flower box welcome sign by adding your own colors and flair.
- Versatile: Use this floral box welcome sign time and time again by customizing it for weddings, bridal showers, baby showers, brunches, and more!
Loving this easy build? Check out a few more of my beginner friendly projects: DIY Candy Wall, DIY Farmhouse Table
Why Make Your Own Flower Box Welcome Sign
Lately, I’ve been seeing the cutest flower box welcome signs for events. I’m not sure who originally created this idea, but I love it!
So, I immediately went to Etsy to see how much these babies go for. I discovered they can run anywhere from $140-$300+! I’m not totally surprised because although it’s a doable DIY project, it does take time and the cost of products.
But if you are reading this, then you are probably okay with rolling up your sleeves and making your own instead paying someone else to do it. So, lets get into how I made mine.
Now, there are a number of different variations and ways to make this. I decided to do the Polaroid style shadow box but this style does call for a jigsaw.
Materials Needed
Tools Needed
Cuts List

Variations/ Adaptations
Change the base: If you want, instead of setting this sign on an easel, you could place boards behind the flower box welcome sign that help it stand like a picture frame. I have even seen some that fold in using hinges for easy storage.
A-Frame: You could also build an a-frame or “sandwich board” style welcome sign that you add flowers and decorations to.
Change the Flowers: The colors I used in this flower arrangement complemented the theme of my event. You can use any colors and flower combinations to accompany the theme of your party.
Add lights: If you are using this inside, in a dimly lit space or even at night, adding twinkle lights would really make this welcome sign stand out.
Use Foam Board: Want to make it really lightweight and even cheaper? Try making this same flower box board out of Foam Board instead of plywood!
How to Make A Flower Box Welcome Sign DIY
- Make your frame by attaching the 24 inch pieces at top and bottom and the longer pieces on the sides as shown below. Use nail glue on ends and then use brad nailer to secure (Image 1).
- Attach one piece of your 24×30 sheet of 1/4” inch wood to the frame with wood glue and attach with brad nailer (Image 2).

3. Next you’re going to cut your square opening out the remaining 1/4″ sheet of wood. This is when you have to use your jigsaw. The size of the opening I made is 19×20″ but you can totally adjust that if you want a smaller or larger opening. If you don’t have a jigsaw you can have your top piece cut down so you only cover the bottom of your box. You can still get the same effect but it wont be completely closed in. Lightly sand everything once cut (Image Below).
4. Paint the inside of the box, the edges, and the plywood. Once dry, you attach your shelf using Brad nailer. This will hold the floral foam so you can add your flowers later (Image 4).

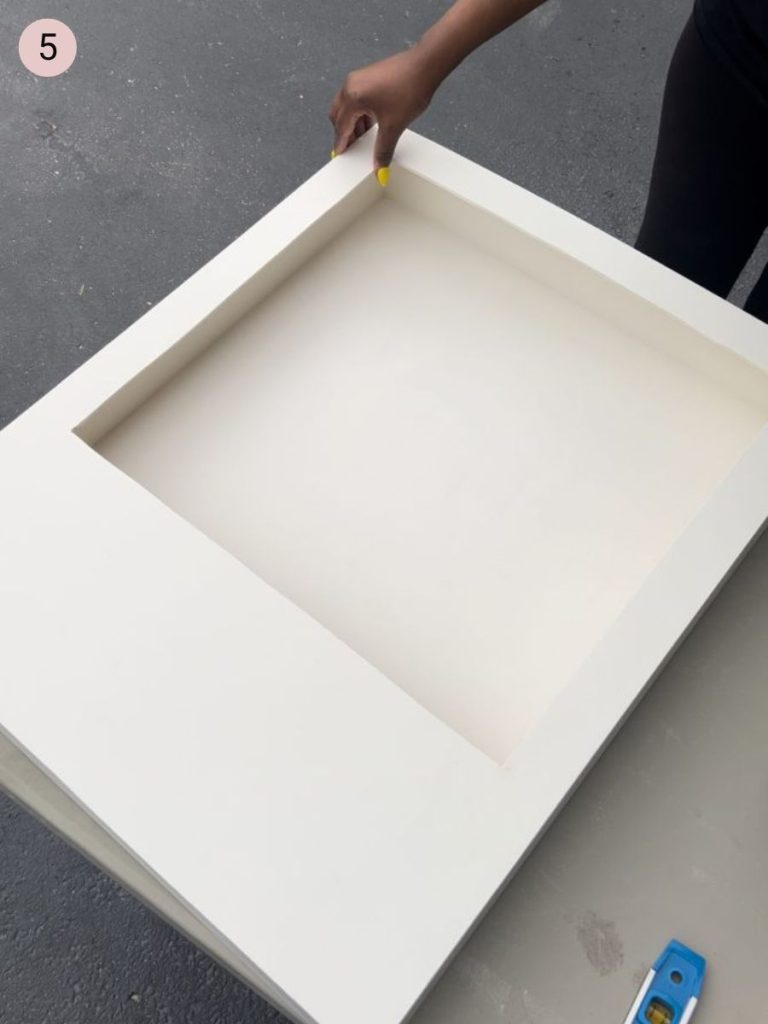
6. Attach the top piece that you cut out using wood glue and secure the front with the Brad Nailer (Image 5).
7. Customize your sign using Cricut and attach. Using vinyl is a great option because you can easily remove it and reuse this sign for multiple events!
8. Place the floral foam blocks on shelf and add faux flowers of your choice!
Tips for the best result
- Don’t make the board too big to fit on your easel.
- Trim the flower foam with a foam cutter or shave it down with a knife so it fits in the board and cannot be seen.
- Doing this project on a table or countertop is ideal.
How to Fill a Flower Sign Box with Flowers
After spending the time to build your own custom flower box welcome sign, you don’t want just throw those flowers in the box and have them falling all over and falling out. Glue also won’t work. What I suggest is using green flower foam. You can get it just about anywhere, the dollar store, hobby lobby, or here on amazon.
Just stick the stems of the flowers into the foam one at a time until you have the look you want. The foam also makes it easy to change the flower positions if you decide you don’t like your first try at flower arranging. You can watch my TikTok to see the foam I use.
Another benefit of the flower foam is that it is easy to remove the flowers so you can redesign things the next time you use this DIY welcome board for another event.
If you like seeing the tutorial better than reading it, check out YouTube or Instagram!
Looking for another outdoor project? How about How to build a Porch Planter Box
FAQ’s
What size board do I need for a welcome sign
You can really use any size, but I like it to be big enough for people to be able to read it form pretty far away. In that case I recommend dimensions no smaller than 2 feet wide by 3 feet tall.


Read the Comments +