


How many times a day do your kids ask you if they can get a snack? Well, in my house, with four kids, the snack requests can become overwhelming. Especially if I’m working on a project. So about 5 years ago, I decided to build this diy snack organizer so the kids had access to healthy snacks all day long. This worked so well for me because as much as I love the idea of having dedicated snack drawers, we just didn’t have the free drawer space to do it. So this was the perfect solution!
Why you’ll love this project
- Beginner Friendly: This diy snack station is perfect for anyone just staring out. I actually built this stand about 5 years ago when I was first starting as a DIY’er myself.
- Budget Friendly: If you look online to buy something similar, a snack bin organizer can cost around $300 or more. By building it yourself, you can save a ton of money and customize the size to your space.
- Kid Friendly: When you are a busy mom, it can be hard to make sure your kids are eating healthy snacks all day. This snack storage idea allows you to choose which snacks you want your kids to have access to so they don’t snack on junk food.
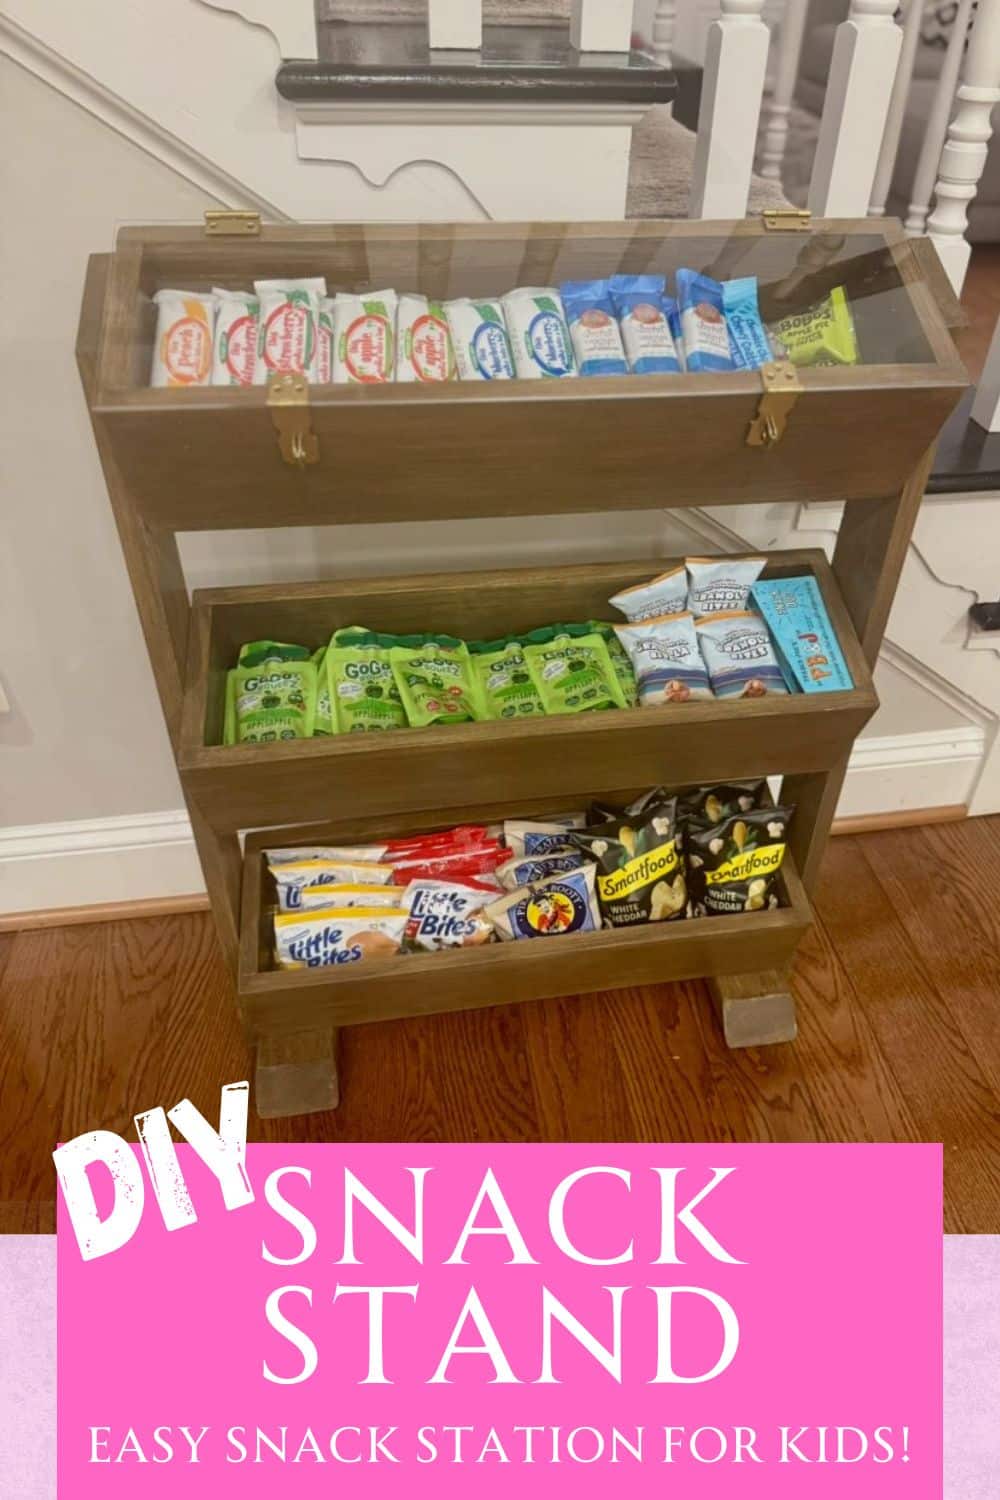
- Customize with a clear top: For those who may think an open snack bin won’t work in your home, you can easily add an acrylic locked top to it! (See below)
- Great option for teachers: Teachers who may have a snack or treat bin they want to keep visible but locked can also add a clear acrylic top.
What is a Snack Organizer?
This particular design is made of wood and looks a lot like a fruit and veggie stand with bins. I chose this design because I loved the look of it and also the easy accessibility for the kids. It is perfect for keeping my kitchen organized and making snacks convenient when my kids get home from school or an activity. Mine is placed in our breakfast room but you could also use this inside a pantry or just outside of your pantry.
The plans for this project create DIY snack bin station that is 25.5 X 34 and perfect for placing on the floor near a wall. It is free standing and holds smaller snacks like individual bags of chips, granola bars, raisins, and fruits like apples and oranges.
Materials Needed
- 1x6x8 wood (3 qty)
- 1x4x6 (1 qty)
- 2x4x4 (1 qty)
- Wood Glue
- 2 inch screws
- Nails for nail gun
- Paint or Stain
- Acrylic sheet (only if you want to add cover)
- 2 inch hinges (only if you want to add acrylic cover)
- Hook & Lasp (if you want to add lock)
- Lock
- Clamps (strongly recommended if doing this alone)
- Clear Gorilla glue (only if adding acrylic cover)
Tools Needed
- Drill
- Nail Gun
- Sander (hand or orbital)
- Razor blade (to score acrylic sheet)
- Miter saw (for angled cuts – optional)
Cut List
- 6 pieces @ 24 inches long (1×6)
- 3 pieces @ 22.5 inches long (1×6)
- 6 pieces @ 5.5 inches long (1×6)
- 2 pieces at 34 inches long cut at at 25 degree angle at one end of each (1×4)
- 2 pieces at 10 inches long with a 45 degree angle cut on each end (2×4)
Variations/ Adaptations
- Add acrylic cover with lock to prevent kids from ransacking the bin lol
- Create adjustable dividers for different sized snacks.
- Label using Chalk Markers, vinyl labels, or clip on tags.
- Create a rustic look by dry brushing with chalk paint.
- You could potentially mount this on the wall if you use a lighter wood option.
Let’s Build it
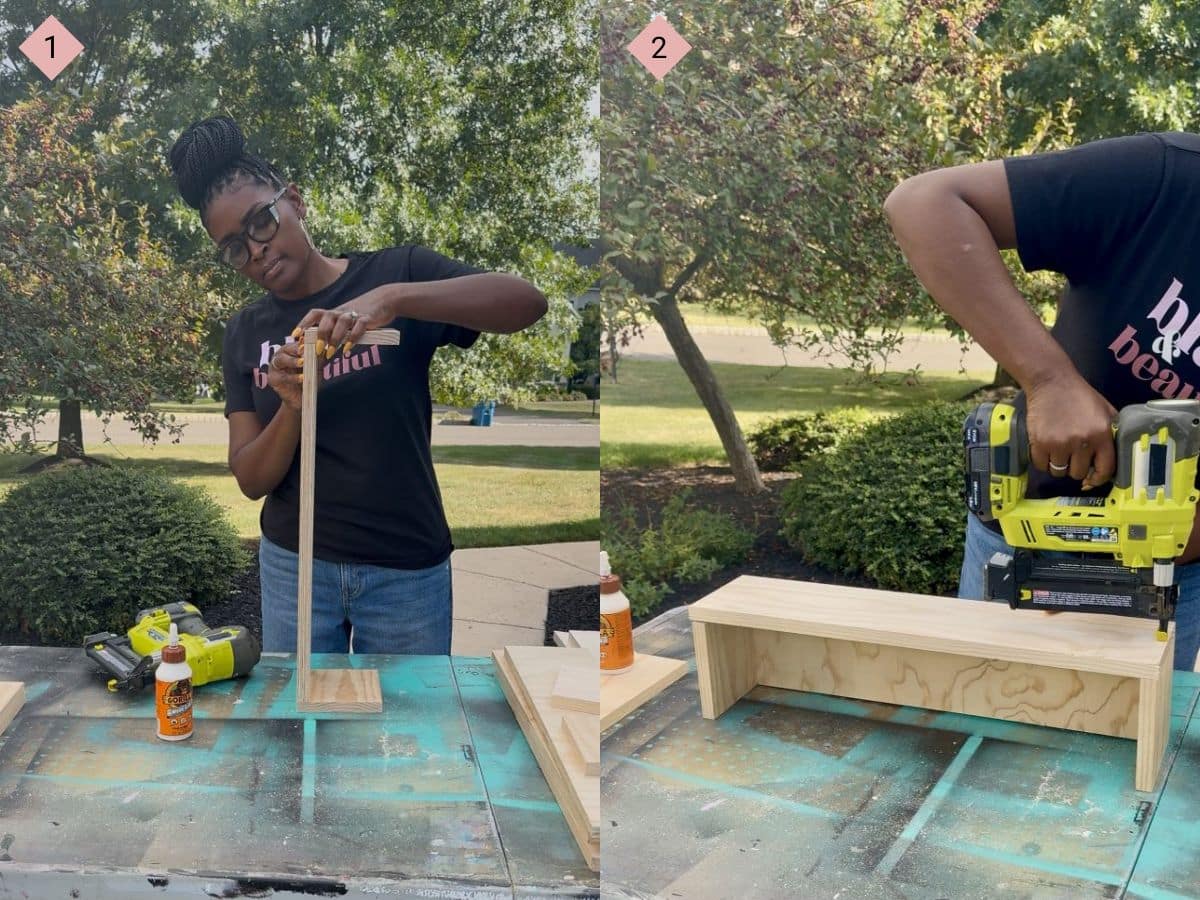
Step 1: After your wood is cut, the first step is to make the 3 boxes. Grab 2 of your 5.5″ pieces of wood and 1 piece of your 22.5″ from the 1×6. Use wood glue and attach the smaller pieces to each end of your 22.5″ as shown above. Be sure to use wood glue before attaching with your nail gun. This is the bottom of your first box.
Step 2: Grab 2 of your 24 inch pieces of wood (1×6) and attach on each side as shown in pic. Use wood glue and attach on all sides with a nail gun.
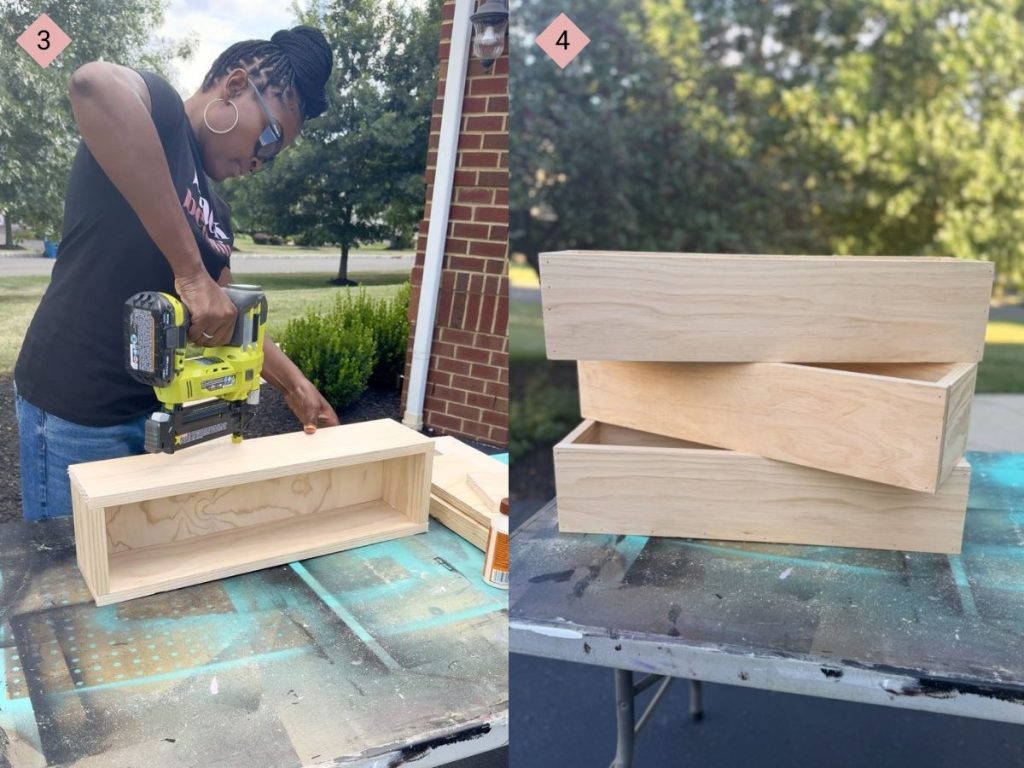
Step 3: Repeat that process to make 3 wood boxes.
Step 4: Now it’s time to attach the “arms”. This will involve your 34″ piece of wood (1×4) and one of your 10″ pieces of 2×4 (which will be the “feet” of your snack bin).
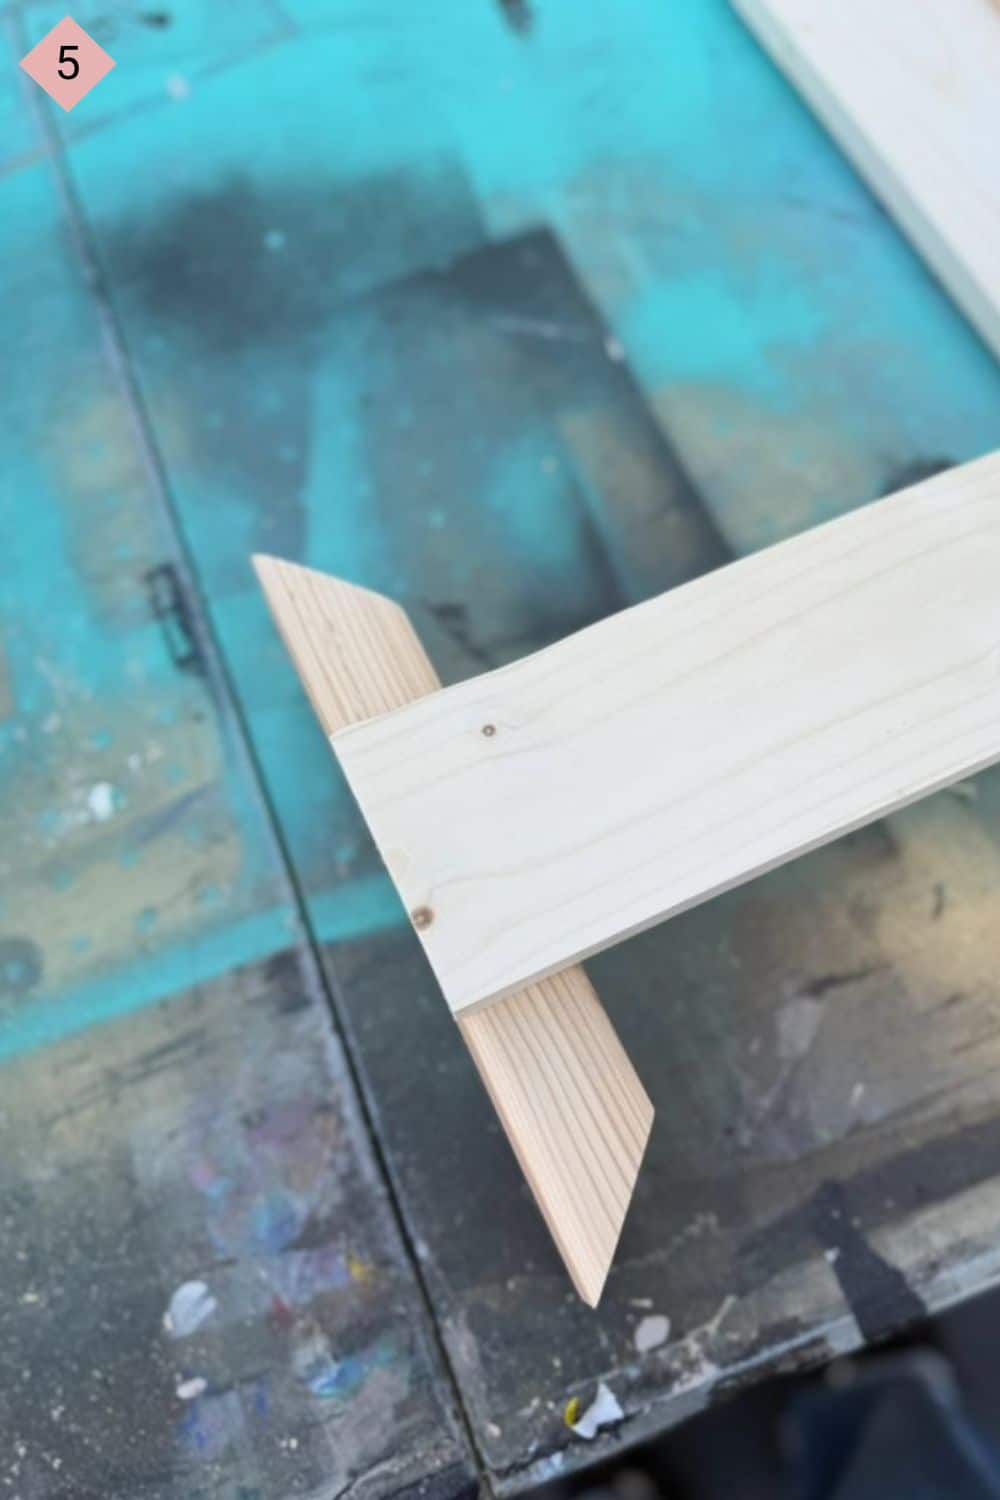
Step 5: Repeat that process one more time.
Step 6: Sand all your finished pieces then paint or stain all pieces.
Step 7: Once fully dry, it’s now time to assemble your bin. I chose to have all 3 of my boxes lean forward a bit. You can tweak this a bit and have your bottom bin sit straight. Totally up to you.
Step 8: In terms of how far to tilt it. I pretty much eye balled it. You may prefer yours to lean down more or sit more upright.
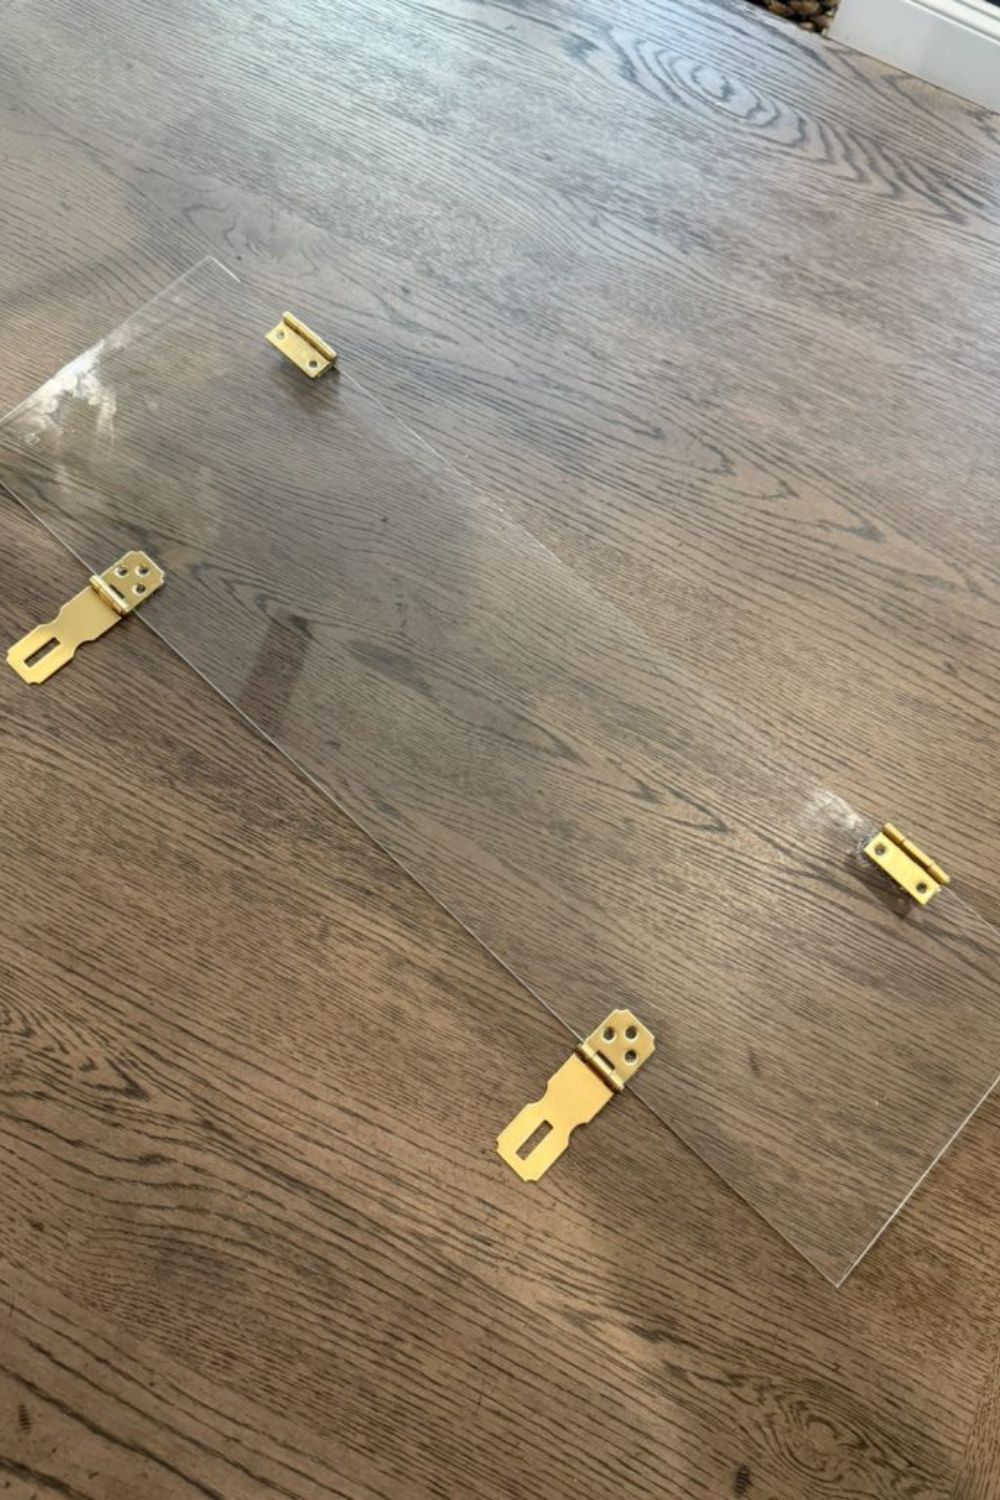
Step 9: If you want to add acrylic cover, you’ll need to score the acrylic then add hinges. I glued my hinges to the acrylic using Gorilla Clear Glue then screwed them on the backside. Be careful with the glue oozing out. (*You have to let the glue cure for at least 24 hours).

Tips
- Make sure to choose a sealant that is food safe (if you plan to put fruit in it). We only use our for packaged goods.
- For use with smaller children, sand down your corners really well and/or pad them to prevent a possible injury.
- Choose a finish that wipes easily for easy cleaning like a satin, semi-gloss, or gloss.
Repurposing Ideas for this DIY Snack Organizer
I hate building projects that can only be used for a short time, and for one purpose. So I always think about other ways I can use a build. Here are some ideas I thought of for this project since it is organizational, sturdy, and great for holding small things:
- Spice rack
- Shoe Organizer
- Book holder
FAQ
Does this DIY Snack Organizer need to be anchored to the wall?
No, but if you have small children, it may be a good idea to anchor it.
What is the best wood for this project?
I used regular common wood.
What is the best way to clean this snack organizer?
Wipe down and vacuum out any crumbs.
VIDEO- Check out my video of me making this project and send me yours if you decide to give it a try!


Read the Comments +