


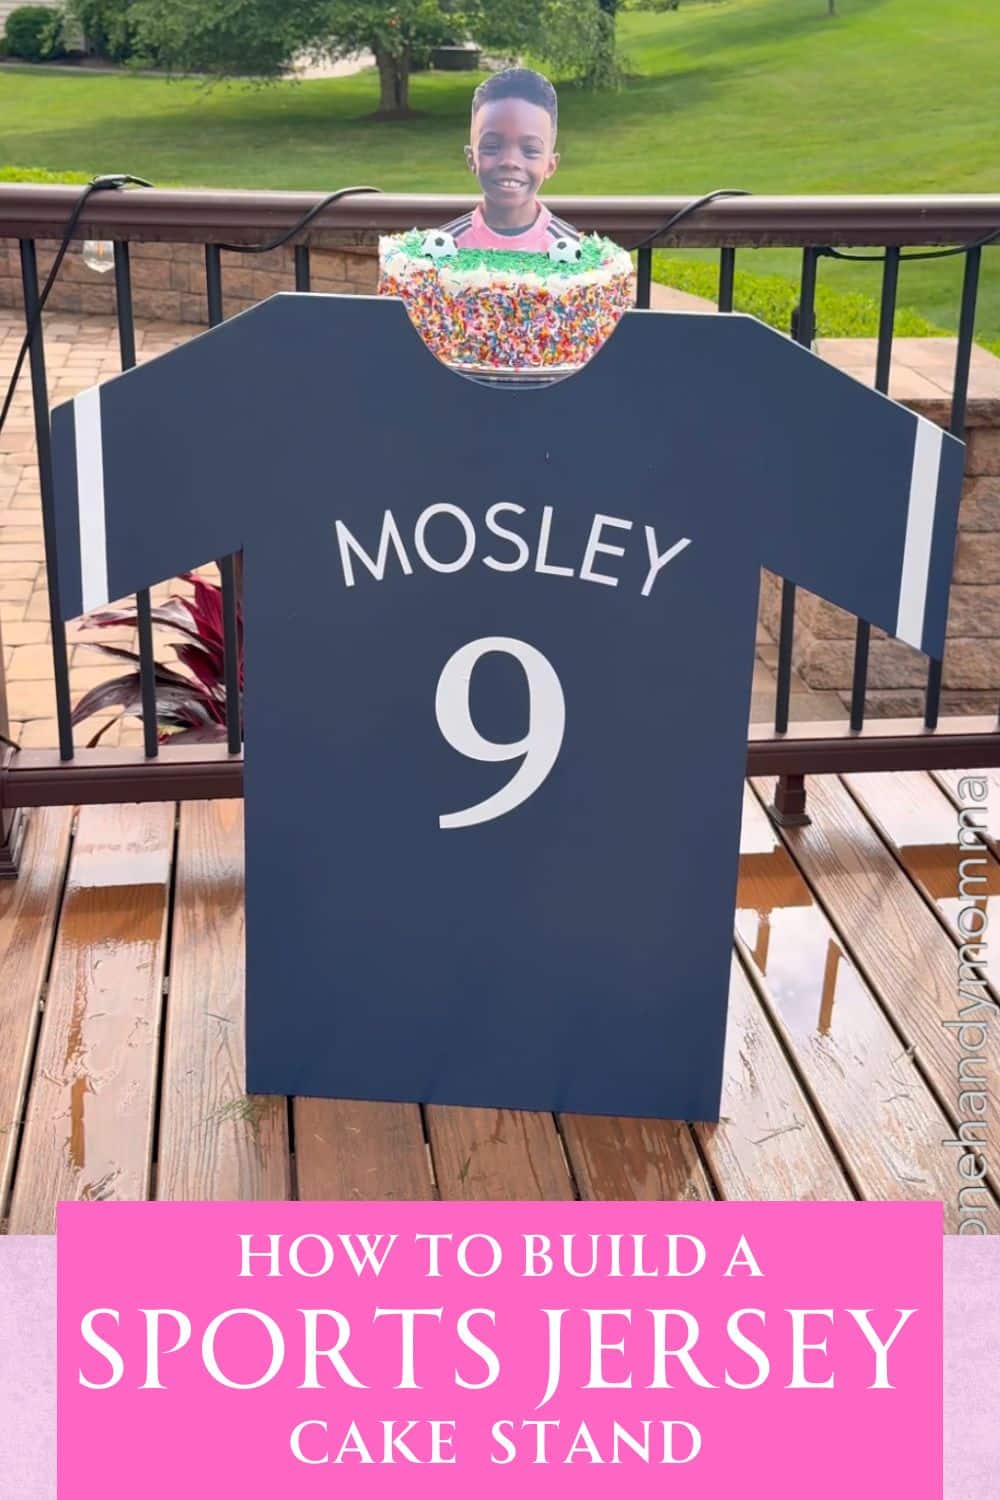
Last week I was trying hard to come up with a great party prop idea for my son’ birthday. The day before, it finally came to me! I made this wooden sports jersey cake stand for his birthday the day before the party and used it as a cake stand! It was super easy and he absolutely loved it.
Why you’ll love this project
- Super fast: This is one of the fastest party props I have ever made. I was literally finished in 2 hours. The only other prop I made that was almost as fast was this Once Upon A Time Storybook Backdrop.
- Beginner Friendly: The only major tool you need is a jigsaw.
- Kid Favorite: My son loves sports, so seeing his jersey in a life sized version was thrilling to him. However, my girls loved their Sephora Themed Photo Backdrop Prop
Looking for more party prop ideas? Check out my How to make a DIY Dessert Cart {aka Candy Cart} or How to Build a DIY Candy Dispenser Wall for a Party
Why I’m doing this project
I love building special party props for my kids’ birthdays. This year it was a little more difficult figuring out something my son was going to love. But I realized that his love of sports was what was going to make this project a win.
Materials Needed
- 1/2 inch plywood (at least 36×36)
- 3/4 inch plywood (at least 48×48)
- Screws
Tools Needed
- Circular saw
- Jigsaw
- Drill
- Kreg Jig(*optional but strongly recommended)
Cut List
- Use 36×36 to cut jersey out of
- Top of stand (1 piece) – 17x 13-3/4
- Sides of stand (2 pieces) – 31.5 x 13-3/4
Variations/ Adaptations
- You will want to change the color, name, and number to reflect your own child’s real sports jersey.
How to Build a Wooden Sports Jersey Cake Stand
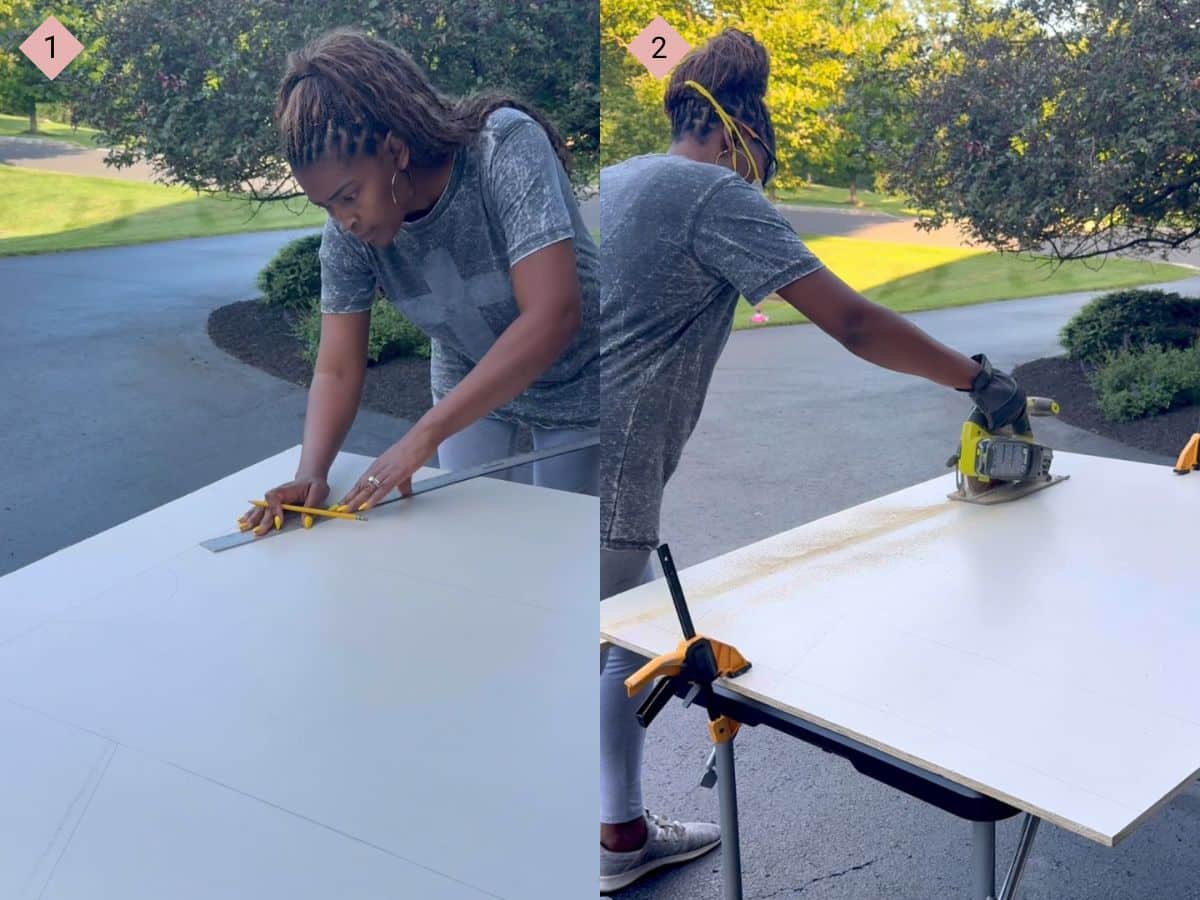
Step 1: Using a pencil and a straight edge, trace out a pattern for the jersey (Image 1).
For the neckline, find the middle point from bottom of wood & measure 32-5/8 from the bottom up. Make a mark with pencil. The midpoint of the lowest point of the scoop of neckline should hit here. This will ensure the stand you build won’t be too short or too tall.
Step 2: Using a circular saw, cut out the pattern along the lines you drew (Image 2).
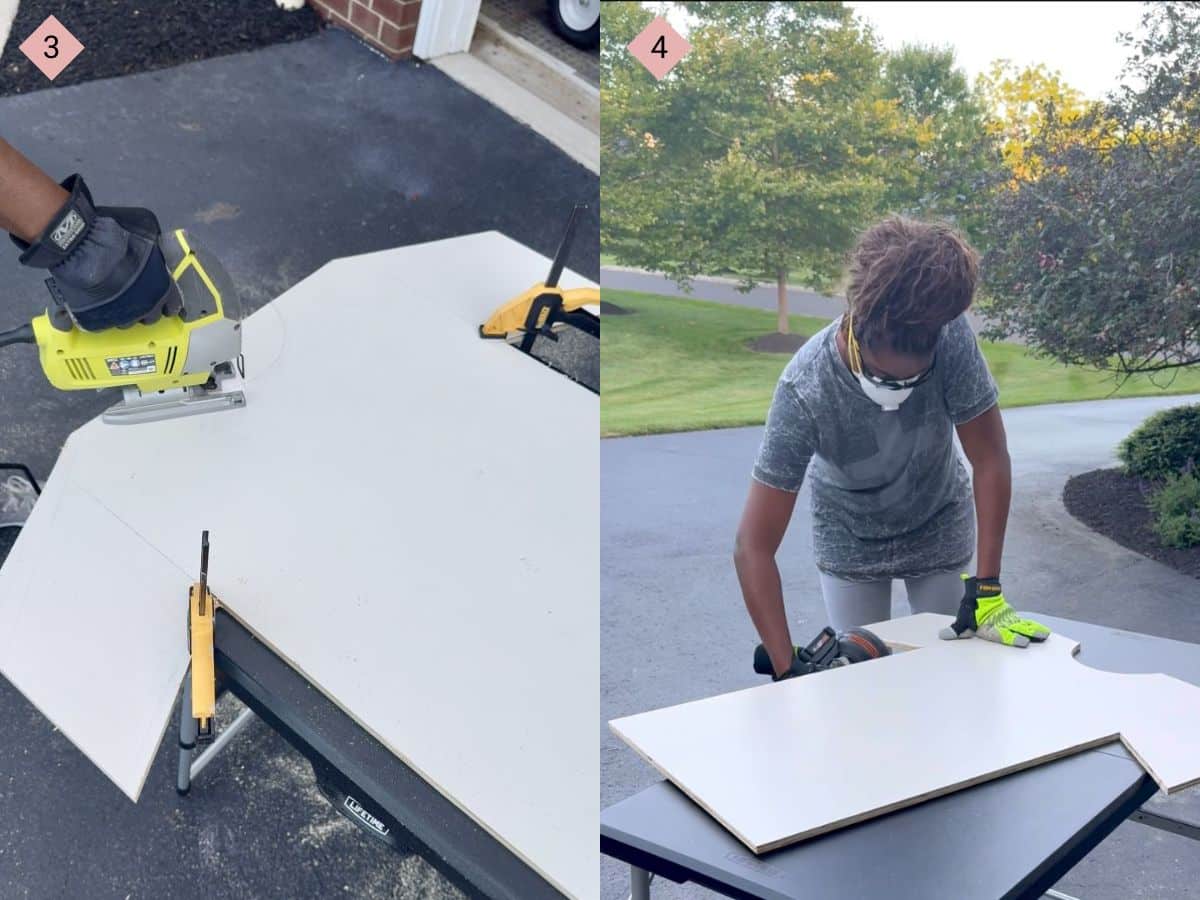
Step 3: Use a jigsaw to cut out the neckline (Image 3).
Step 4: Sand the edges of the wooden jersey using a power sander or hand sander (Image 4).

Step 5: Add 3 pocket holes to one side of the piece of wood for the top of stand. Add 3 pocket holes at the top of each of the side pieces and then 2 pocket holes on one side of each of the side pieces as shown. Then assemble (Image 5).
Step 6: Assemble the top and sides of the stand portion of the build (Image 6).
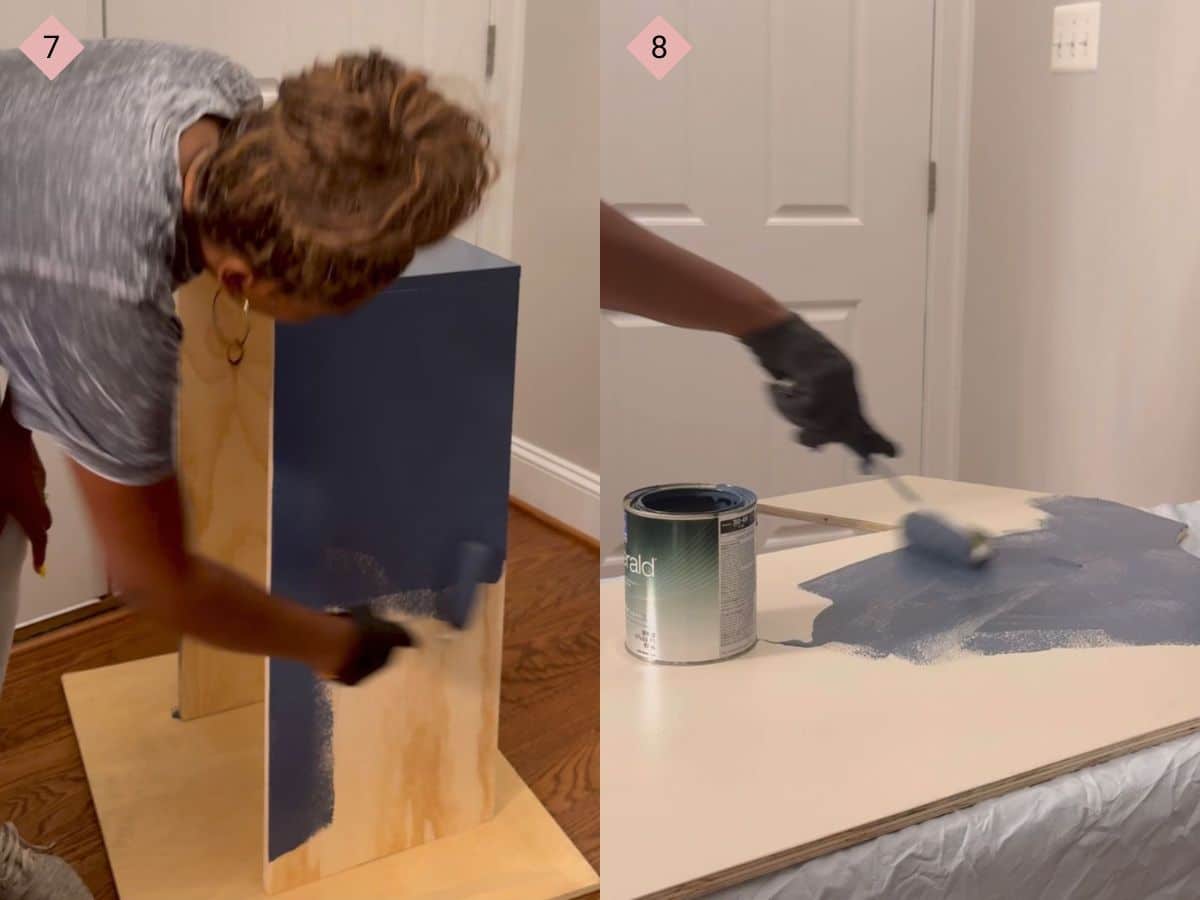
Step 7: Paint the sides of the stand using a small roller (Image 7).
Step 8: Paint the jersey cutout using a small roller. You can also add stripes or decorate the jersey anyway you want (Image 8).

Step 9: Attach the back to the jersey using your pocket hole screws (Image 9).
Step 10: Attach the number and name to the jersey (Image 10).
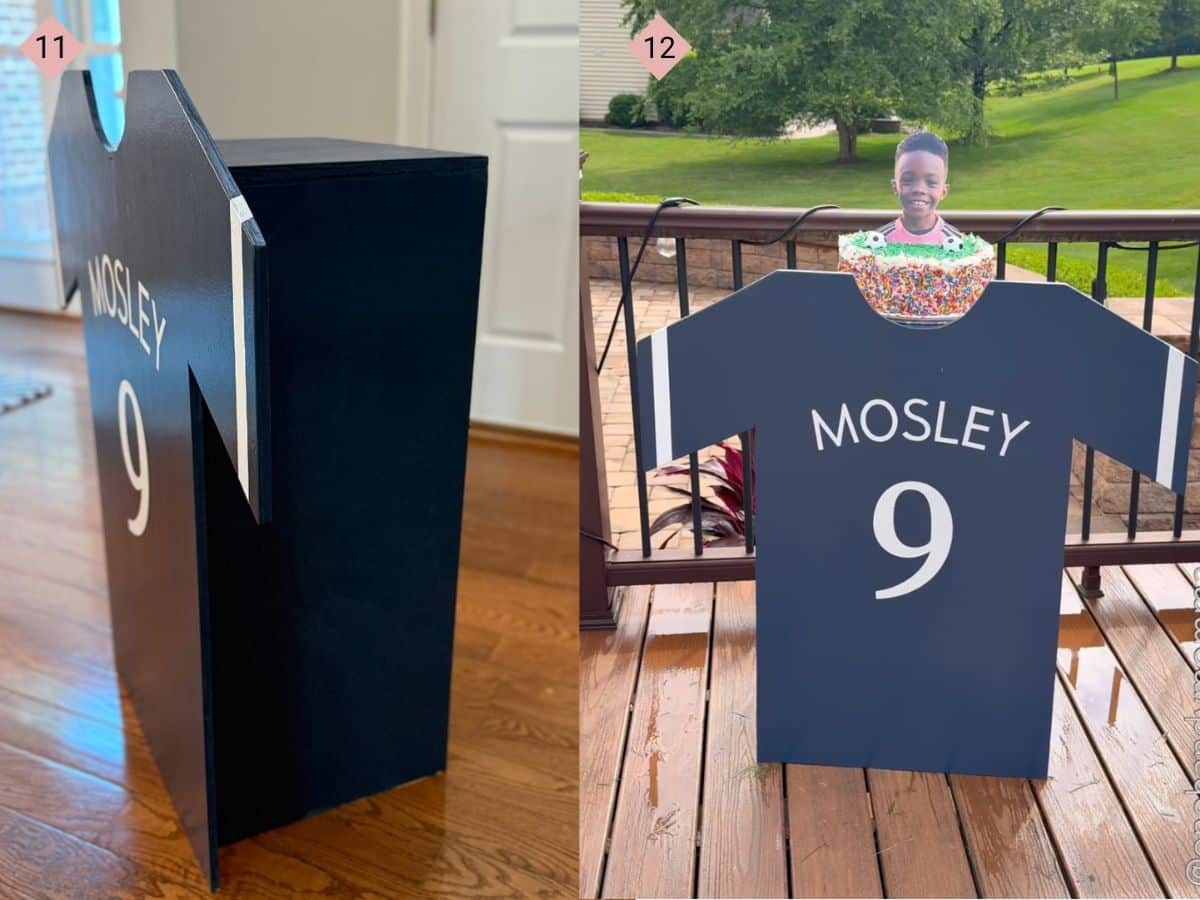
Step 11: Once everything is attached it should look like this (Image 11).
Step 12: Now you can set your cake on the top (Image 12).
Looking for more fun party ideas? How to Build a DIY Concession Stand for Family Movie Night or How To Make A DIY Projector Screen Frame {for outdoor movies!} are both great ideas!
Tips
- For the cake topper, I printed out my son’s face, backed it with cardstock, and then glued it to a toothpick to stick in the cake.
FAQ
Could you use this for something else after the party?
If you remove the back of the stand, you could use this as a way to actually display a real jersey on the wall.
Do you think you could make this a wall decoration?
Absolutely! I think removing the back of this and using the jersey as a wall decoration is a great idea!


Read the Comments +