


Are you tired of laundry baskets cluttering your space? Learn how to build a stylish DIY tilt-out laundry hamper that doubles as a beautiful piece of furniture. It’s the perfect blend of function and design for any room!

If you’re anything like me, the sight of laundry piled up in a corner is a total eyesore. Sure, there are plenty of hampers and laundry baskets out there that technically get the job done—but nothing beats a custom solution that ties seamlessly into your home’s style.
That’s why I made this easy to build DIY tilt-out laundry hamper that actually looks like a stylish piece of furniture. It’s designed to look like a dresser, so it not only hides the mess but also adds to the room’s aesthetic. In this post, I’ll walk you through exactly how I made a DIY Tilt-out laundry hamper for my bedroom —because who says laundry solutions can’t be beautiful too?
Why you’ll love this project
- Stylish Storage Solution – Hide dirty laundry in plain sight by creating this tilt out laundry hamper DIY that looks like a chic piece of furniture.
- Customizable to Your Space – Tailor the size, finish, and hardware of this laundry hamper to perfectly match your home’s aesthetic.
- Budget-Friendly & Satisfying – Save money and enjoy the satisfaction of creating something beautiful and functional with your own two hands.
Want to build more stylish home decor? Try these beginner friendly projects: Step by Step – DIY Upholstered Bench TUTORIAL, DIY Farmhouse Table, DIY Easy Peezy Console Table (TUTORIAL)
What is a Laundry Hamper?
A laundry hamper is a piece of furniture that can hold your dirty laundry while it waits to be washed. A laundry hamper is a great way to keep laundry from being tossed on the floor, sort clothes before you do the wash, and help kids learn where their clothes go after being worn.
Laundry Hamper Vs. Laundry Basket
The difference between a laundry hamper and a laundry basket is that a hamper is used more for storage of laundry while dirty and a basket is used to transport clothing to and from the laundry room whether clean or dirty.
Materials Needed
This post contains affiliate links.
Tools Needed
*You can make this with just a drill and nail gun but for a cleaner look, I’d suggest using a Kreg Jig as well to hide some of your screws. A Kreg Jig allows you to create pocket holes as show below. There are also specific screws to use for pocket holes.
Cut List
You can get your wood cut at Home Depot or Lowes. Otherwise, you’ll need a circular saw and/or table saw to cut your pieces.
Variations/ Adaptations
I decided to build my own custom DIY hamper cabinet out of wood so it fits my home decor and style. But you can add your own flare whether it is made out of metal, with extra details, or a completely different size.
- You can get as creative as you like with this. Whether you change color, add an extra cabinet, add a stencil or wallpaper, the options are unlimited.
- Personalize it for each child’s room or put it in laundry room to help with sorting.
- You can also adjust the height and/or width of this build depending on the size laundry bags you plan to use. I built mine based on this laundry bag which is inexpensive and sturdy.
How to Make A DIY Tilt Out Laundry Hamper
Step 1: You will first want to determine how many cabinets you want in your DIY laundry hamper. Mine has two, one for lights and one for darks. But you can customize it for what works for you. You can make this a single cabinet or add more to your build. If you add more, you’ll have to buy more wood and figure out how to adjust the cuts.
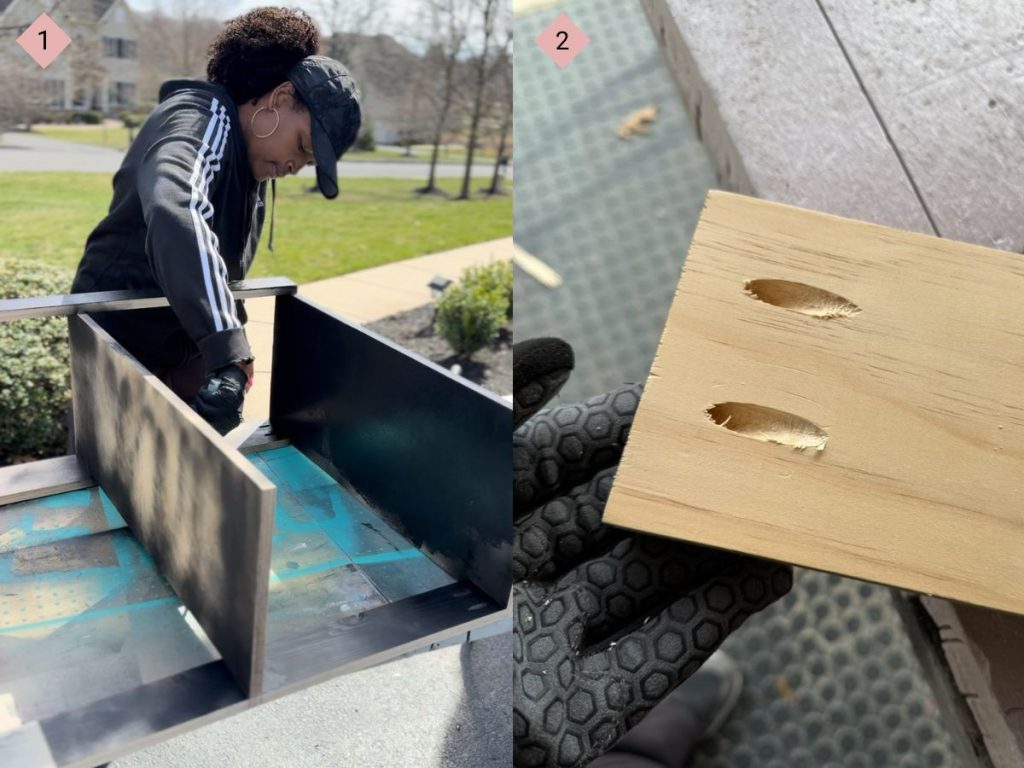
Step 2: Cut your wood based on the cut list above. Be sure to double-check measurements so everything fits snugly. Remember, if you don’t have a circular or table saw, you can get your cuts done at Home Depot or Lowes but I always suggest double checking the cuts before you leave the store (Image 1).
Step 3: Once the wood has been cut, you will want to add pocket holes to the ends of the two back pieces of wood so you can drill them into the side pieces easily (Image 2).
Step 4: Gather your 2 side panels (A) and your 2 back pieces of wood (H). You can use screws and a drill to attach as shown below. Remember to always use wood glue when putting together your build. One (H) will be placed at top and one (H) will be placed at bottom in between your 2 (A) panels. This will form the dresser-like structure. Make sure everything is square before the glue dries (Image 3).
Step 5: Once that’s completed, flip over the clothes hamper frame and add your footer (G) on the front of the frame as shown (Image 4).

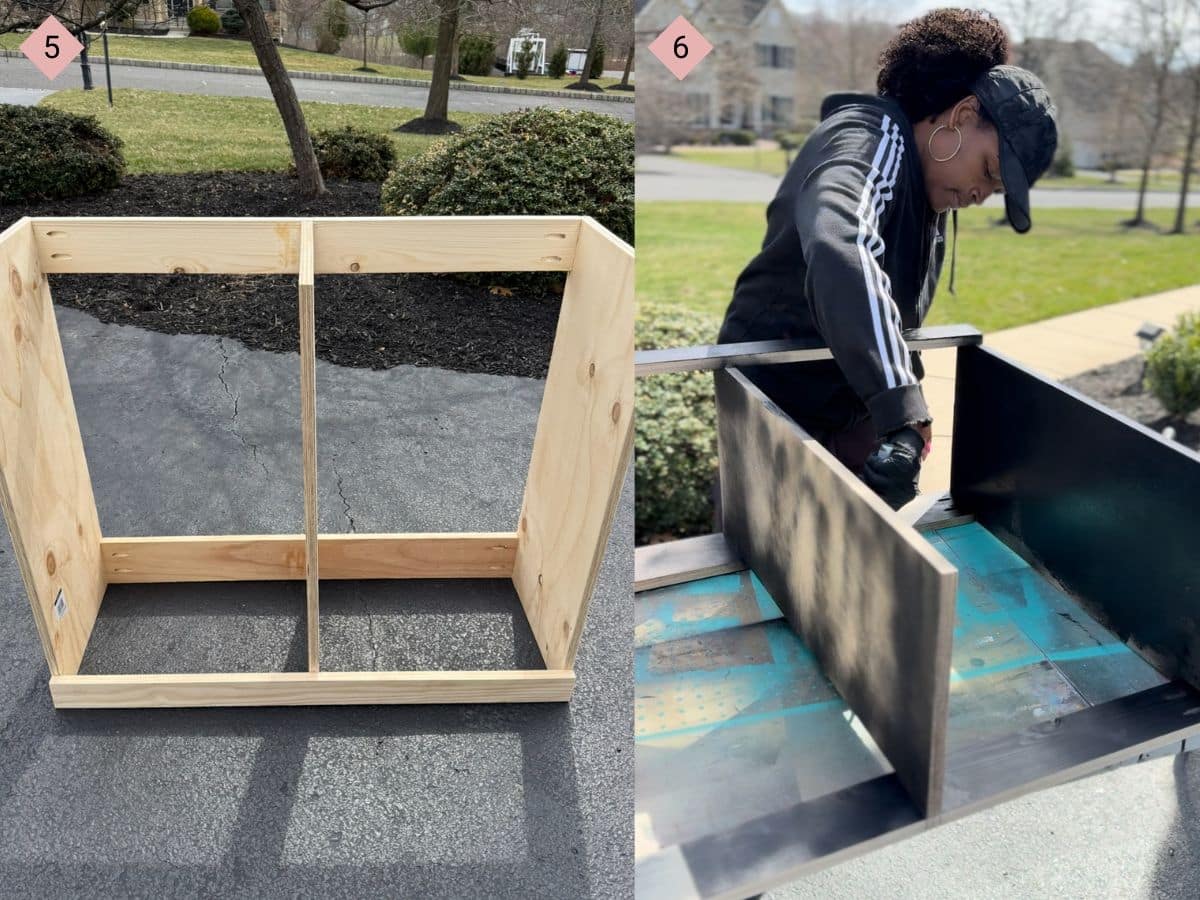
Step 6: Once the outside of the hamper frame is done, add your middle panel (B) in the center of frame and attach with screws to the boards that run across the back of the frame, and then use nails on the front with your nail gun (Image 5).
Step 7: Next, you will want to fill the holes with wood filler and paint the frame (Image 6).
Step 8: Here’s where you can really customize the look you want. Since I wanted mine to look like a dresser, I added 3 boxes on each panel. You don’t have to do that. It definitely adds more time to the build but I love the way mine turned out. That said, there are tons of ways you can design your panels/doors. You can also keep them clean without any molding. I added this natural rattan to mine to give a great texture to the look of the cabinet, and used wood strips I cut and painted to create the boxes (Image 7).
Step 9: Next, we’re going to attach the bottom of the hamper holder (E) to each of the panel doors using screws. Then attach the back piece (F) as shown (Image 8).

Step 10: If you’ve made it to this point, you’re pretty much at the finish line now! Lay the frame on floor then insert each panel into the cabinet. Lay the hinges flat so one half is on the panel and the other side of hinge is on the footer. Attach with screws that come with hinges. Add 2 hinges on each panel as shown (Image 9). *After attaching, I chose to paint my hinges so they don’t stand out as much.
Step 11: Add a chain to each side of cabinet using 3/4 inch screws. This prevents your panel from falling flat on floor when you open it (Image 10).

Step 12: Finally, attach your countertop/top piece to the top of cabinet using your nail gun and attach your hardware. Place your laundry bags inside. You now have a custom laundry hamper that’s both functional and beautiful (Image 11).

Struggling to find laundry solutions that work? Try getting your kids involved by using these ideas:
Tips For Best Results
- Always double check you cuts. “Measure twice, cut once.”
- Paint your hinges to match the design of your cabinet laundry hamper.
- Choose hardware that you love and looks best with your chosen design features and colors.

If you give this project a try, I’d love to see your version! Tag me @onehandymomma on IG and TikTok!
Other Uses for a DIY Laundry Hamper
A DIY laundry hamper doesn’t just have to be used for laundry! Change up the look and put it into the toy room for a tilt out toy storage unit! You could also use this as extra flat space for folding in a small laundry room.
VIDEO
If you are better at learning though media, here’s a quick video of me doing this project: WATCH HERE!


Read the Comments +