


Now that I’ve finally finished with my DIY bed frame and headboard (will be sharing soon), I decided I wanted a storage bench to go at the foot of the bed. So in true fashion, I decided to make one! Although I’ve built wood storage benches before as well as upholstered benches (no storage) but I’ve never upholstered a storage bench so I decided to give it a try for this project and I LOVE the way it turned out!
I made mine to sit at the foot of our King size bed so my dimensions are: 55 inches wide x 17.5 inches tall.
Why you’ll love this project
- Simple Plans: You only need 6 pieces of wood!
- Beginner Friendly: You can do this even if you don’t have a ton of experience!
- Cost Effective – Very cost effective way to customize a bench for the space you need. The cost of fabric can impact how much it costs to make.
- Customizable: Make it any size you want!
Materials Needed
- 3/4″ thick plywood -2 sheets of 4’×8’ ft
- Drill
- Screws (2 inch)
- Nail gun (optional)
- Upholstery foam (3 inches thick)
- 3 yards of upholstery fabric of your choice (try to stay away from fabrics that are too thick, they can be harder to work with. Likewise, stay away from fabrics that are thin like 100% cotton fabrics)
- Cushion Wrap/batting
- Staple gun (cheaper) Staple gun I use now (more expensive but great) and staples (You can use a manual staple gun but they hurt your hands after awhile, but they are cheaper)
- Narrow Crown Stapler (*optional)
- Spray glue for foam (I use this but any spray glue works)
- Wood glue
- Scissors
- Electric knife
- Sharpie marker
- Hinges
- Soft close lid hinge
- Gold furniture legs
- Corner claps (optional)
Tools Needed
- Staple Gun & Staples
- Drill
- Narrow Crown Stapler (optional)
- Nail Gun (optional)
Cut List
- 2 qty – 55 x 12-1/4 inches (long sides of storage box)
- 2 qty – 16 x 12 -1/4 inches (short sides of storage box)
- 2 qty – 55 x 17-3/8 inches (top & bottom of bench)
- Tip: Take measurements to Home Depot/Lowes and get your wood cut there
How to Build a DIY Storage Bench

1. Lay out your wooden boards on a flat surface and attach with wood glue & screws (Image 1). Two long pieces parallel to each other and two short pieces on ends.
2. Next, use your corner clamps to help hold wood pieces together as you screw them in. (Image 2). Then attach bottom piece (55 x 17-3/8″)
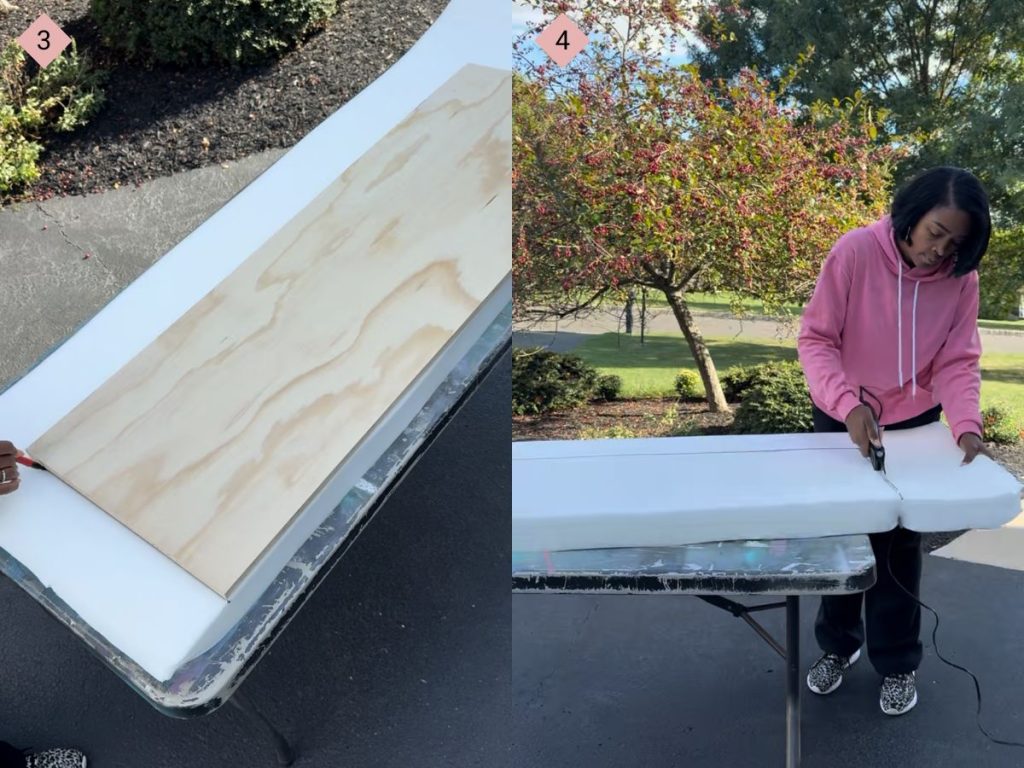
3. Once box is constructed, sit that to the side and grab your other 55 x 17 3/8″ piece of wood (bench top). Place the board on top of the foam and use your marker to trace it.
- Once you’ve marked it, grab your electric knife and slowly cut your foam. It doesn’t have to be perfect since it’ll be covered up but try to make your cuts as clean as you can (Image 3).
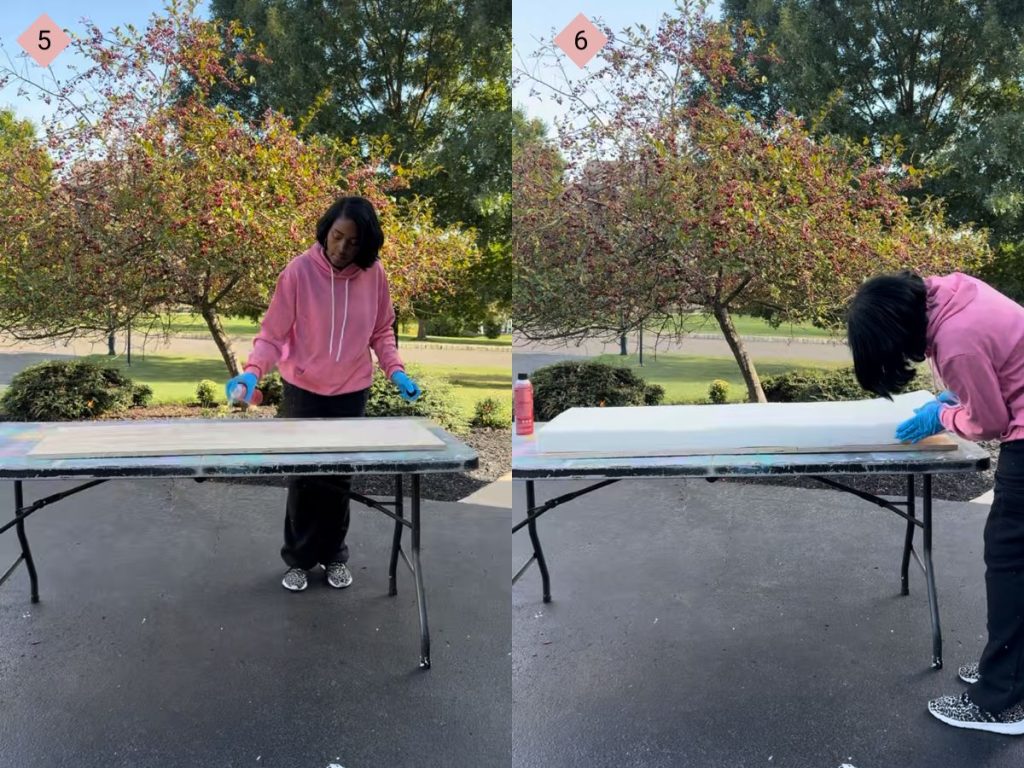
4. Secure the foam to the board using adhesive spray. Allow it to dry completely before proceeding.
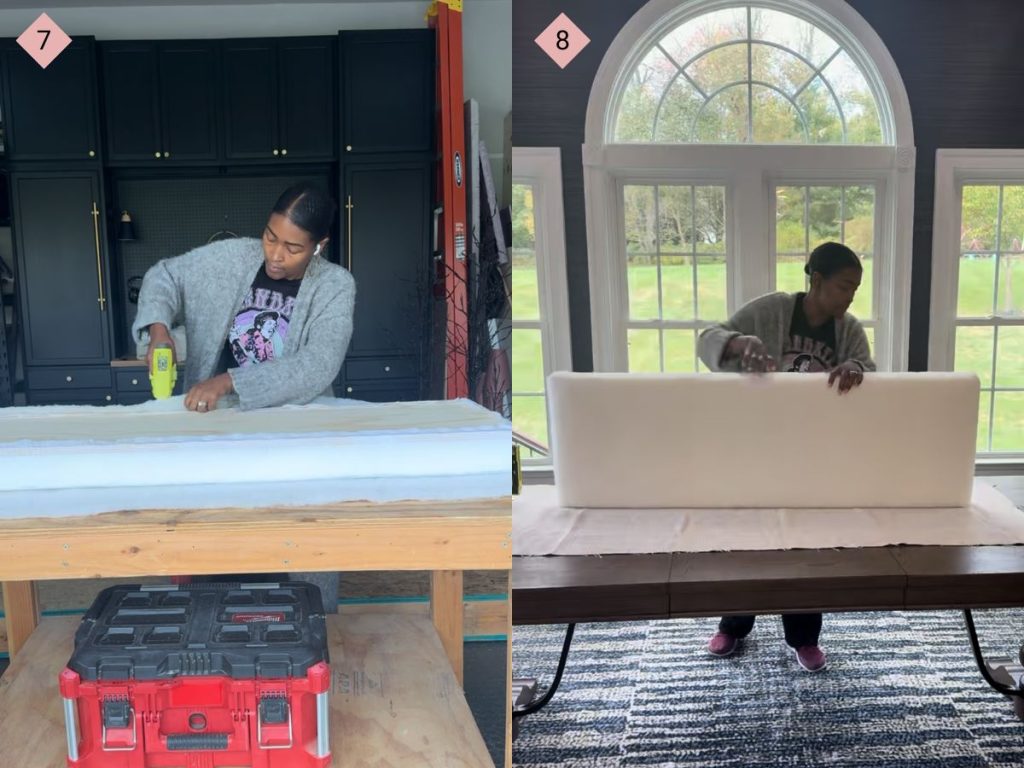
5. Lay out the batting over the foam-covered board, ensuring there is enough excess to wrap around the edges. Secure the batting to the underside of the board using a staple gun, pulling it taut as you go. Trim any excess batting (Image 7).
6. Grab your fabric. It’s time to wrap your bench top cushion. Spread out fabric on a clean surface (be sure to make sure your fabric is on the “wrong side” or “inside” so when you wrap it, the correct side of fabric will be showing)
- Set your cushion face down and starting from one side, pull the fabric over the batting and foam, smoothing out any wrinkles or creases as you go.
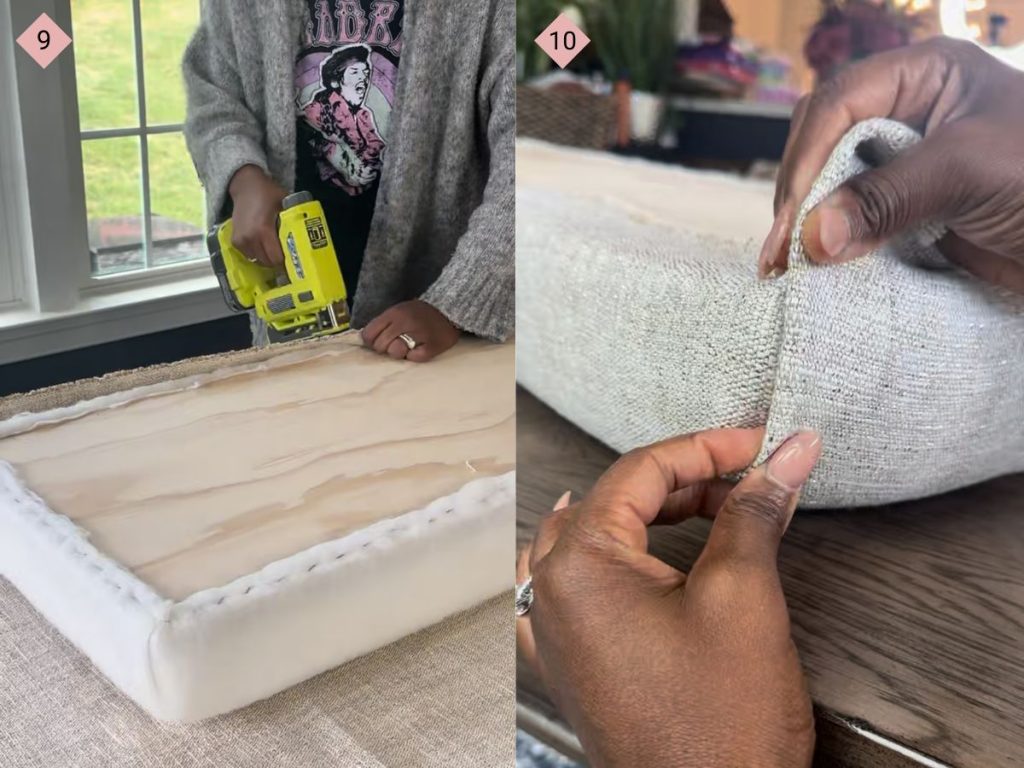
7. For the edges, you will be doing a tuck method. See video below for a visual. This is the way to finish your edges without sewing.
8. Now that the bench top is done, you can add dust fabric to cover the underside of your cushion.
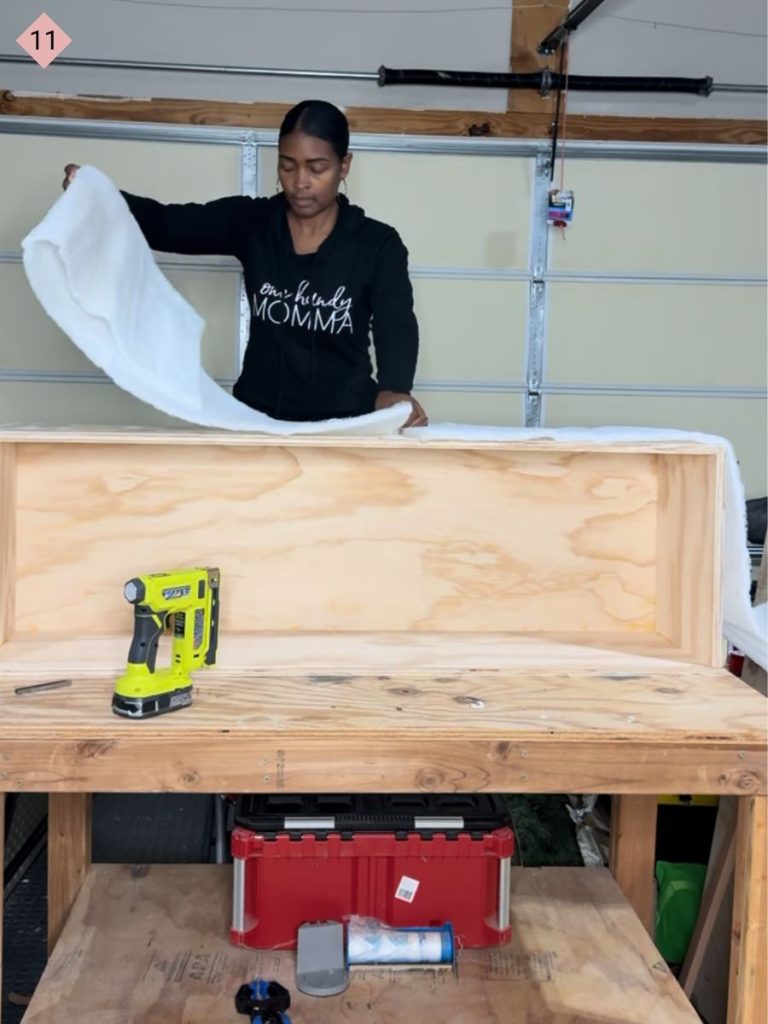
Now it’s time to upholster the storage box. Grab your batting/cushion wrap and wrap it around the box attaching with your adhesive spray.
9. Now you’ll need to cut a long strip of your fabric about 15 inches wide. wrap your fabric around the box. Secure from the bottom first and attach fabric in sections. Pull tight and staple as you go.
10. Repeat around the box until done. To finish the back side you’ll just tuck your fabric as shown in pic below.
11. If you want a finished look inside your box you can use some of your leftover fabric to create strips to cover the staples (as shown below).
12. Add your chest hinges and then your soft close hinge (if desired)
Done!
Tips
Choose a fabric made for upholstery. Thinner fabrics will not hold up to the wear and tear the bench will see over the years.
FAQ
How do you attach the cushion to the wood bench?
Using hinges
How thick should the wood be for a bench seat?
3/4 inch
Is plywood strong enough for a storage bench?
Yes


Read the Comments +