


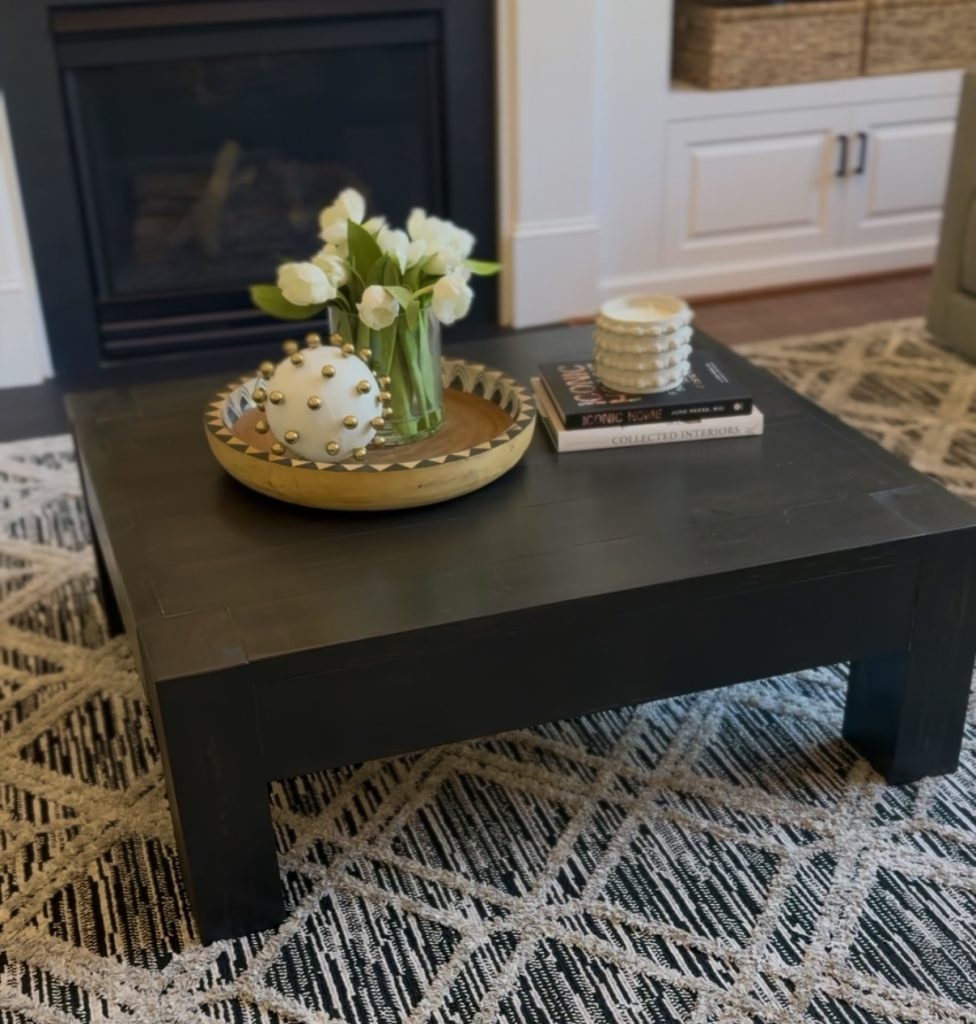
We’ve been in our current home about 3 years and I’ve been looking the perfect coffee table ever since we moved in. I finally came across a style I really love but it cost around $2000+. Now, I’m totally not against paying for what I really want but I’m also very much an “I can make that” type of girl. And since the table didn’t seem terribly difficult to build, I figured I’d give it a shot.
One thing I love about DIY is that even if something doesn’t turn out perfect, you either learn from it or live with the imperfections of what you made. Most times, I can live with it not being perfect.
Here’s the designer table I drew inspiration from.

The biggest difference in this table vs. the one I made is the fact that they used 4x4s for theirs. I’m using 2x6s for my build so it won’t look exactly the same but it’ll have the same silhouette ultimately. For the cost savings, it’s completely fine with me lol!
Now, this is a relatively simple build but you will need a few tools to complete this.
You can get your cuts done at Home Depot or Lowes (which I do often) but just know they aren’t always accurate and it really does depend on who ends up cutting your wood. Some people are really meticulous and others aren’t. They also don’t guarantee precision cuts so there’s really nothing you can do if they don’t cut them correctly.
Tools Needed for this project:
- Drill
- Kreg Jig
- Planer (optional but recommended)
- Sander (I prefer orbital but you can also use hand sanders)
- Rubber Mallet
- Miter or Circular Saw (unless you get cuts done at store)
Materials Needed for this project:
- Wood (2x6x8) 7 of them
- Kreg Jig screws
- Wood glue
- Stain
- Clamps (strong rope can be used alternatively but clamps are best)
- Wood filler
My final table dimensions are 38 ¼ L X 43 ½ W X 15 ¾ H . You can totally change the size to make it bigger or smaller though.
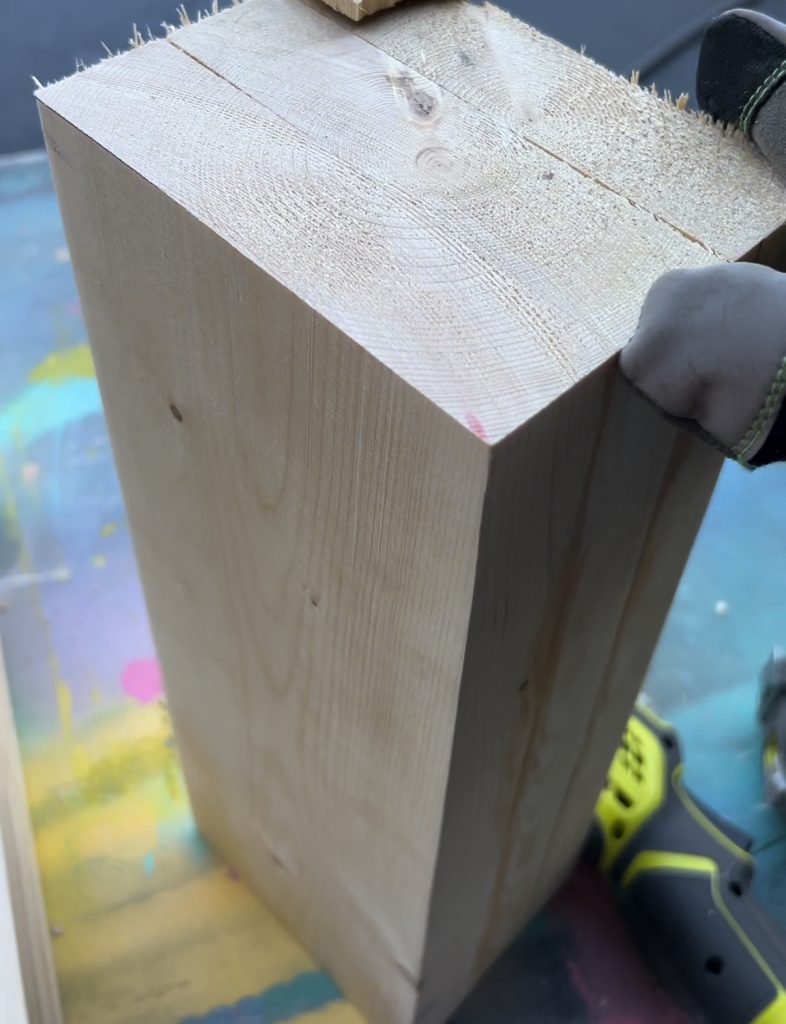
For the legs, I did a glue up of 3 pieces of wood per leg. This is where the clamps come in handy. Once you glue the pieces together, they need to dry overnight and clamps are good to keep them together while drying.
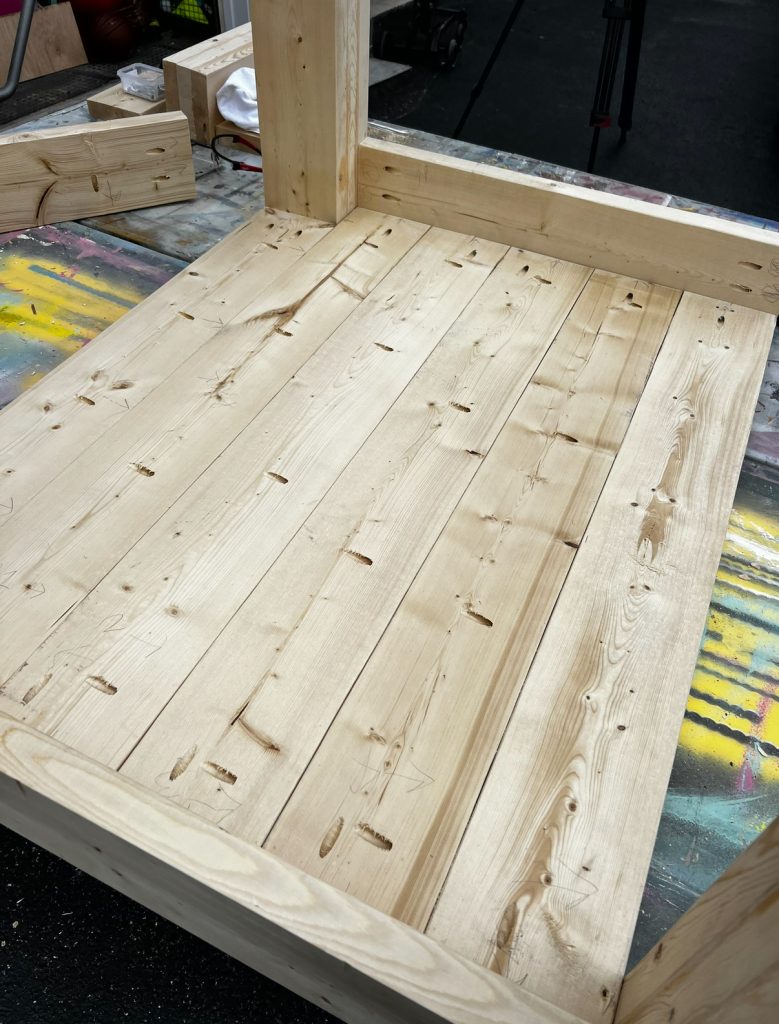
Once the legs are done and set to the side, you can start on the tabletop. This is where the Kreg Jig comes in. You’ll need to add pocket holes to the 2x6s for the table top. That’s how you’ll attach them.
I would consider this a cross between beginner and intermediate project only because of the need for multiple tools. If you’re interested in my detailed tutorial, you can get my building plan here.


Read the Comments +